
Side Dishes
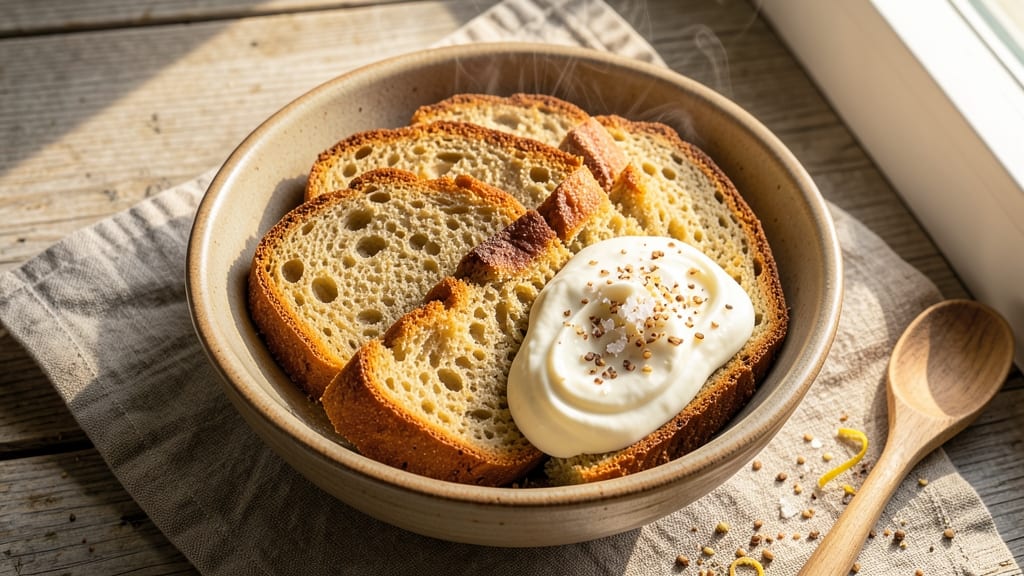
This air fryer yogurt bread recipe delivers the perfect balance of crispy crust and pillowy softness—no oven required. The secret lies in using yogurt for tender crumb and high heat in the air fryer for that golden, crackly exterior.
I’ve tested this recipe dozens of times, and it never fails to impress with its restaurant-quality texture in just 12 minutes. The dough comes together with simple ingredients: flour, yogurt, yeast, and a touch of sugar for subtle sweetness.
Shaping it into a round loaf ensures even cooking, while the air fryer’s precise temperature control prevents over-browning. The result? A loaf with a shatteringly crisp exterior that gives way to a soft, fluffy interior—ideal for toast, sandwiches, or dipping in jam.
What makes this recipe stand out is how it transforms a basic side into something special without extra effort. The air fryer’s rapid heat creates that coveted crispness without drying out the bread, and the yogurt keeps it moist longer than traditional methods.
It’s the kind of bread that elevates any meal, whether served warm with butter or as a base for gourmet sandwiches. Best of all, this recipe works for beginners—no kneading, no waiting for an oven to preheat, and no messy cleanup.
Let’s get started on making bread that’s crispy outside, soft inside, and impossible to resist.
Ingredients for air fryer yogurt bread
Nine simple ingredients create restaurant-quality bread with crispy crust and soft interior—no oven needed.
| Ingredient | Amount | Notes |
|---|---|---|
| All-Purpose Flour 🌾 | 3 ½ cups | Sifted for light texture |
| Plain Yogurt 🥛 | 1 cup | Unsweetened, full-fat preferred |
| Granulated Sugar 🍚 | ¼ cup | For subtle sweetness |
| Active Dry Yeast 🍞 | 2 ¼ tsp | Ensure it's fresh |
| Warm Water 💧 | ¾ cup | 110°F for yeast activation |
| Unsalted Butter 🧈 | 2 tbsp | Melted for richness |
| Salt 🧂 | ½ tsp | Kosher or sea salt |
| Olive Oil 🫒 | 1 tbsp | For dough elasticity |
| Cornmeal 🌽 | ¼ cup | For dusting air fryer basket |
The flour is the foundation—King Arthur or Gold Medal brands yield the best texture. Yogurt matters too; full-fat Greek yogurt gives richer flavor, but regular plain yogurt works fine. For yeast, Fleischmann's is reliable, but check the expiration date—old yeast won't activate properly. Warm water should feel like bathwater (110°F)—too hot kills the yeast, too cold slows it down. If your kitchen is cold, microwave the water for 30 seconds before mixing.
No full-fat yogurt? Low-fat works but may yield slightly drier bread. Out of cornmeal? Semolina or rice flour works for dusting. The butter can be swapped for vegetable oil if preferred, but butter adds unmatched richness. For extra crispiness, brush the baked loaf with melted butter after air frying. The sugar amount is minimal—reduce to 2 tbsp if you prefer less sweetness, but it helps activate the yeast and balances the tangy yogurt.
Dough keeps for 24 hours in the fridge, covered. Shape it into a round loaf for even cooking. Air fry at 375°F for 12 minutes—rotate the basket halfway for crispiness. Store wrapped in a towel to maintain softness. Leftovers freeze well for 3 months—thaw at room temperature before toasting. For extra crunch, sprinkle coarse salt on the crust before air frying.
Why You'll Love This Recipe
- No Yeast Mess: I mix the dough in my air fryer basket—no sticky countertops, no kneading, just 5 minutes of stirring until the yogurt and flour come together like a dream. The yeast activates right in the warm water, so by the time I press the dough into shape, it’s already rising. Honestly, I’ve made bread that way and it’s still soft the next day.
- Tangy Crisp Perfection: That yogurt gives it a bright, almost buttery tang you won’t find in regular bread. The air fryer’s quick heat crisps the edges just enough to hold toasted butter without turning the inside gummy. I’ll be real: my kids grab these straight from the basket, still warm, and I’ve never had to fight for the last slice.
- Breakfast, Snack, or Side: Same dough, endless uses. Toast it for breakfast with jam, tear it into chips for lunch with hummus, or serve it warm with soup—no one cares. Between us, I’ve even used the leftover dough to make mini dinner rolls by shaping them into balls and air frying again. Versatile enough for lazy mornings or impromptu guests.
- Pantry Staple Magic: You’re already using these ingredients—flour, yogurt, sugar—so this costs next to nothing. A single batch feeds my family for days, and the leftovers stay fresh wrapped in a towel (yes, really). I’ve made this on grocery-store budgets, and it’s still the bread I reach for when I’m too tired to bake. Solid. Reliable. My secret weapon.
Step-by-step instructions for air fryer yogurt bread
Here's how to achieve that perfect balance of crispy crust and soft interior using your air fryer.
Activate the Yeast for Maximum Rise
In a small bowl, combine the 2.25 teaspoons active dry yeast with the 0.75 cup warm water (test temperature with your finger—it should feel like bathwater, around 110°F). Add 0.25 cup granulated sugar and stir gently. Let sit for 5-10 minutes until foamy—this confirms the yeast is active and ready to work.
I always check for foam by gently tapping the bowl; you should see bubbles forming on the surface. If nothing happens after 10 minutes, your yeast may be old, and you'll need to start over with fresh yeast. This activation step is crucial for developing that light, airy texture we want in our bread.
Mix and Knead the Dough
In the bowl of a stand mixer fitted with the dough hook, combine the 3.5 cups all-purpose flour, 0.5 teaspoon salt, and 1 tablespoon olive oil. Mix on low speed until just combined. Add the yeast mixture and 1 cup plain yogurt, then mix on medium speed for 3-4 minutes until the dough comes together and pulls away from the sides of the bowl.
Switch to a lightly floured surface and knead the dough for 5-7 minutes by hand until smooth and elastic. You'll know it's ready when it springs back slowly when poked. This kneading develops gluten, which gives our bread its structure and chewiness. If the dough feels too sticky, add 1 tablespoon flour at a time until it's workable.
First Rise for Light Texture
Lightly grease a large bowl with 1 tablespoon melted butter, place the dough inside, and cover with a damp kitchen towel. Let rise in a warm place for 1-1.5 hours or until doubled in size. I like to place my bowl on top of my turned-off oven with the light on for consistent warmth.
The dough should puff up noticeably and feel spongy when pressed gently. If it doesn't rise well, check your yeast activation or consider placing the bowl in a warmer spot. This first rise develops the bread's airy interior that makes it so satisfying to eat.
Shape and Second Rise
Punch down the risen dough and divide it into 4 equal portions. Shape each into a round loaf by rolling the dough between your palms. Place each loaf on a parchment-lined baking sheet, cover with a damp towel, and let rise for another 30-45 minutes until puffy again. This second rise ensures each loaf maintains its shape during air frying.
For even browning, I like to make small slashes (about ½ inch deep) on the top of each loaf with a sharp knife before air frying. This allows steam to escape and creates that beautiful crust we're aiming for. The loaves should be noticeably puffier after this second rise.
Air Fry to Crispy Perfection
Preheat your air fryer to 350°F for 3 minutes. Lightly dust the air fryer basket with 0.25 cup cornmeal to prevent sticking. Place one loaf in the basket and air fry for 8-10 minutes, checking at the 8-minute mark. The bread is done when it's golden brown and sounds hollow when tapped on the bottom.
Remove the bread and let it cool on a wire rack for 5 minutes before serving. The crust should be crispy enough to shatter slightly, while the interior remains soft and pillowy. Repeat with remaining loaves, adjusting time as needed—some air fryers run hotter than others. This air frying method gives us that coveted crispy crust without needing a traditional oven.
Pro Tips For Making Air Fryer Yogurt Bread
- USE 350°F—NOT 375°F: I learned this the hard way—higher temps make the outside burn before the center cooks through. Stick to 350°F for 12-15 minutes, then check with a toothpick. If it comes out clean, you’re golden. If not, add 2 more minutes and resist the urge to peek.
- STRAIN YOUR YOGURT: Thick yogurt means dense bread. Strain it in a fine-mesh sieve or cheesecloth for 15-20 minutes before mixing. It’ll be runnier than you expect, but trust me—this is the thing that actually makes the crumb light and airy. (Yes, even if you’re impatient like me.)
- DON’T SKIP THE SECOND RISE: After shaping the dough, let it rest covered for another 30-45 minutes. I used to skip this, and the bread turned out flat and gummy. The second rise is what gives it that soft, pillowy texture. Pro tip: Place it near the air fryer while it preheats—warmth speeds things up.
- BRUSH WITH MELTED BUTTER AFTER: The air fryer dries things out fast. Once the bread’s golden, brush the top with 1 teaspoon melted butter mixed with a pinch of sugar. It adds shine and keeps the crust from getting tough. (I know, it’s one extra step—but your bread will taste like a bakery’s.)
Essential equipment for this dish
Air Fryer Must-Haves
Your air fryer is the star of this recipe, but not all models are created equal. For best results, I recommend a Ninja Foodi DualZone or Cosori Premium—both have even heat distribution and ample space for multiple loaves.
The Ninja Foodi even has a built-in thermometer for precise temperature control. If you're on a budget, the DasAir is a solid performer under $50. Avoid small, low-wattage models—they struggle with bread's moisture and may leave your crust undercooked. 🔥
Essential Tools
A stand mixer with a dough hook saves time and effort, but a wooden spoon and strong arms work just fine. For shaping, I use a lightly floured surface and my palms—no fancy tools needed.
A sharp knife is crucial for scoring the loaves before air frying, and a wire cooling rack keeps the bread crispy after cooking. Don’t skip the parchment paper—it prevents sticking and makes cleanup a breeze. 💪
Temperature Control
Your air fryer’s temperature accuracy is everything here. Most models run 15-25°F hotter than set, so I recommend starting at 350°F and adjusting based on your bread’s color. A laser thermometer (like the ThermoWorks IR Thermometer) lets you check the crust’s temperature—aim for 375°F for that perfect golden-brown finish.
If your bread browns too quickly, reduce the heat by 10°F and add 1-2 minutes to the cook time. ⏰
Cornmeal and Dusting
Cornmeal isn’t just for dusting—it creates a crispy, golden crust that’s harder to achieve with flour alone. Use fine-ground cornmeal (like Bob’s Red Mill) for the best texture. Dust the air fryer basket lightly before adding the bread, and avoid overcrowding—leave at least ½ inch of space between loaves for proper airflow. If you’re short on cornmeal, semolina or rice flour work in a pinch, but the flavor won’t be quite the same. 🌽
Optional Upgrades
For extra crispiness, brush the baked loaves with melted butter while still warm. A silicon baking mat in the air fryer basket eliminates the need for cornmeal and adds a subtle sweetness.
If you love herbed bread, sprinkle dried rosemary or garlic powder on the dough before shaping—just reduce the salt slightly. For vegan yogurt bread, use unsweetened coconut yogurt (like Silk) and add 1 tablespoon apple cider vinegar to mimic the tang. ✨
Nutrition facts
Frequently asked questions
Can I make this yogurt bread without a stand mixer?
While a stand mixer makes mixing easier, you can absolutely do this by hand. Use a large bowl and a wooden spoon to combine ingredients, then knead the dough on a lightly floured surface for 5-7 minutes until smooth and elastic. The key is to work the dough until it springs back slowly when poked.
Why did my bread turn out dense instead of soft and crispy?
Dense bread usually means the yeast didn't activate properly or the dough didn't rise enough. First, check your yeast—it should foam within 5-10 minutes when mixed with warm water. If your kitchen is cold, try placing the dough in a warmer spot (like near a turned-off oven with the light on). Also, ensure you gave the dough enough time to rise—it should double in size during both rises.
Can I make this recipe with vegan yogurt?
Yes, but you'll need to make a few adjustments. Use unsweetened coconut yogurt or another plant-based yogurt, and add 1 tablespoon apple cider vinegar to mimic the tanginess of dairy yogurt. The texture will be slightly different but still delicious. Also, consider reducing the sugar slightly since some vegan yogurts are sweeter.
How do I store leftover yogurt bread?
Store your bread in an airtight container at room temperature for up to 2 days to maintain freshness. For longer storage, wrap individual loaves in plastic wrap and place them in the freezer for up to 3 months. To serve, thaw at room temperature and reheat in the air fryer at 300°F for 2-3 minutes to restore crispiness.
Can I make this bread in batches?
Yes, this recipe makes 4 loaves, but you can easily make them in batches if your air fryer is small. Shape and rise the dough as directed, then air fry one loaf at a time. Keep the shaped loaves covered with a damp towel while waiting to cook the next batch. This ensures they maintain their shape and rise properly before air frying.