
Side Dishes
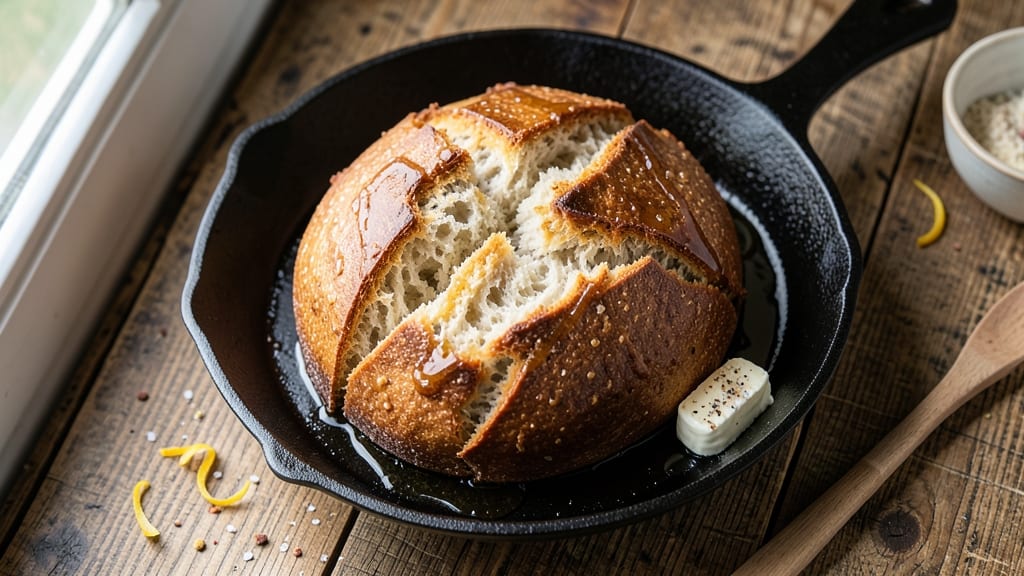
This Amish friendship sourdough bread recipe delivers the perfect balance of sweet honey swirls and a crispy, golden crust—just like the bread you'd find at a Pennsylvania farmhouse gathering.
The beauty of this recipe lies in its simplicity: no yeast, no kneading, and just a few essential ingredients that transform into a loaf with a tender crumb and that signature Amish charm.
I've perfected this method over years of baking, ensuring every slice delivers a satisfying crunch and a hint of sweetness that makes it irresistible.
The secret to achieving that authentic Amish texture begins with a foolproof sourdough starter, which captures the natural fermentation that gives the bread its distinct flavor.
Once your starter is active, the dough comes together in just a few minutes of mixing, followed by a long, slow rise that develops deep, complex flavors.
The honey swirls add a touch of sweetness that pairs beautifully with the bread's rustic, hearty profile, making it perfect for breakfast toast, sandwiches, or serving alongside soups.
What sets this recipe apart is the crusty crown and the tender, flaky layers inside—achieved through careful shaping and scoring before baking. Whether you're using a home oven or a wood-fired setup (if you're feeling adventurous), the results are consistently impressive.
The bread stays fresh for days, making it ideal for meal prep or gifting to neighbors, just as the Amish tradition suggests.
Ready to bake a loaf that feels like a hug from a beloved neighbor? This recipe is designed to be beginner-friendly yet delivers restaurant-quality results. Let's get started on creating a loaf that will have everyone asking for seconds—and maybe even a recipe card to take home.
Ingredients for amish friendship sourdough bread
Essential ingredients for a rustic loaf with honey-sweetened swirls and an artisanal crust.
| Ingredient | Amount | Notes |
|---|---|---|
| Active Sourdough Starter 🍞 | 1 cup | 100% hydration, bubbly and active |
| All-Purpose Flour 🌾 | 4 cups | Unbleached, high-protein preferred |
| Granulated Honey 🍯 | ½ cup | Raw or wildflower preferred |
| Unsalted Butter 🧈 | ½ cup | Cold, cubed for swirls |
| Granulated Sugar 🍚 | ¼ cup | For dough enrichment |
| Diamond Crystal Kosher Salt 🧂 | 1 tsp | Fine grain preferred |
| Whole Milk 🥛 | ½ cup | Warmed to room temperature |
| Large Eggs 🥚 | 1 whole | Room temperature |
| Cornmeal 🌽 | ¼ cup | For dusting baking sheet |
The sourdough starter is the heart of this recipe—look for active bubbles and a slightly tangy aroma when selecting yours. King Arthur or Bob's Red Mill flours work exceptionally well due to their high protein content, which develops that signature Amish chew. For honey, local varieties add subtle floral notes that elevate the flavor profile. The butter should be cold when cubed for the swirls to prevent melting during the rise. If your starter isn't ready, King Arthur's sourdough starter kit is a reliable option for beginners.
No active starter? Use 1 cup of plain yogurt as a substitute, though flavor will differ slightly. For a sweeter loaf, maple syrup can replace honey at a 1:1 ratio. If you prefer less sweetness, reduce honey to 1/4 cup and add 1/4 cup of unsweetened applesauce instead. The milk can be swapped for buttermilk or plant-based milk, though whole milk yields the richest dough. For a gluten-free adaptation, substitute a 1:1 gluten-free flour blend, though texture will differ significantly.
Store the sourdough starter in an airtight container at room temperature for up to 1 week, or refrigerate for 4 weeks. The dough can be shaped and refrigerated overnight for a slower rise, enhancing flavor development. Once baked, the bread stays fresh for 3-4 days at room temperature, wrapped in a clean kitchen towel. For longer storage, freeze slices wrapped in parchment paper for up to 3 months. Reheat slices in a toaster or oven for maximum crispiness.
Why You'll Love This Recipe
- No-Knead Magic: I swear by this recipe because it’s actually hands-off. Just mix the sourdough starter with all-purpose flour, a touch of honey, and a pat of butter—no punching, no fuss. The dough rests while you do other things, and honestly? That’s the kind of recipe I can trust when I’m tired.
- Sweet Butter Crust: That little swirl of honey and butter in the dough? It’s the star. The crust gets a golden crunch while the inside stays soft—like a hug in bread form. My kids fight over the last slice, and I don’t even pretend to care.
- Weeknight Workhorse: This bread is my go-to for breakfast toast, lunch sandwiches, or even a quick charcuterie board. It keeps well for days, so I bake a loaf on Sundays and forget about it—until someone inevitably asks, “What’s for dinner?” (Spoiler: It’s bread.)
- Budget-Friendly Staple: Flour, honey, and butter are cheap, and one batch stretches across meals. I’ve fed a houseful of guests with this, sliced it for school lunches, and still had leftovers for toast the next week. It’s the kind of recipe that makes grocery day less stressful.
Step-by-step instructions for Amish friendship sourdough bread
Master this classic recipe with precise techniques for golden swirls and a perfectly crisp crust.
Prepare the Dough Components
In a large mixing bowl, combine the 1 cup active sourdough starter, 4 cups all-purpose flour, 0.5 cup granulated honey, 0.25 cup granulated sugar, 1 tsp diamond crystal kosher salt, 0.5 cup whole milk, and 1 whole large egg. Using a wooden spoon or dough whisk, mix until a shaggy dough forms. The mixture should be sticky but manageable—this is intentional for the tender crumb we're after.
Let the dough rest for 10 minutes while you prepare the butter swirls. Take the 0.5 cup unsalted butter from the refrigerator and cut it into 1-inch cubes. This cold butter will create those signature swirls when baked. For the baking sheet, spread 0.25 cup cornmeal evenly across the surface—this prevents sticking and adds texture to the bottom crust.
Knead and Shape the Dough
After the 10-minute rest, wet your hands with water and begin kneading the dough on a lightly floured surface. Work for 5-7 minutes until the dough becomes smooth and elastic. You'll know it's ready when it springs back slowly when poked. The dough should be soft but not sticky—if it sticks too much, wet your hands again rather than adding more flour.
Divide the dough into 4 equal portions (about 8 ounces each) and shape each into a 12-inch round. Roll each round into a 12-inch circle about ½-inch thick. Place each circle on a separate sheet of parchment paper, leaving space between them. Cover with a clean kitchen towel and let them rest for 20 minutes at room temperature.
Add Butter Swirls and Proof
Place 1 tablespoon of the cold butter cubes in the center of each dough circle. Fold the edges of the dough over the butter, pinching gently to seal. Roll the dough into a 12-inch log, twisting slightly as you go to create the classic swirl pattern. Place each log seam-side down on the prepared baking sheets (use two sheets if needed). Cover loosely with a towel and let proof for 1-1.5 hours until the dough has risen to about double its size and feels springy to the touch.
Here's the thing—proofing is temperature-sensitive. If your kitchen is cool, give it the full 1.5 hours. If it's warm, check at 1 hour. The dough should have puffed noticeably and the swirls should look pronounced. This resting period develops flavor and ensures a light, airy texture.
Bake to Golden Perfection
Preheat your oven to 375°F with a baking stone or inverted baking sheet on the middle rack. This creates steam for that signature crisp crust. Once preheated, carefully transfer the dough logs to the baking stone using the parchment paper. Bake for 25-30 minutes until the tops are deep golden brown with a crackly crust and the internal temperature reaches 190°F when measured with an instant-read thermometer.
I like to rotate the pans halfway through baking for even color development. The swirls should be prominent and golden, with the butter having melted just enough to create those beautiful caramelized streaks. For extra shine, brush the tops with a little whole milk after 15 minutes in the oven—this enhances browning and adds that classic Amish finish.
Cool and Serve
Remove the bread from the oven and let it cool on the baking sheets for 10 minutes. Then transfer to a wire rack to cool completely. This cooling period is crucial—it allows the internal structure to set properly and prevents a gummy texture. The bread should have a crisp exterior, tender crumb, and those signature honey-sweetened swirls throughout.
Slice while still slightly warm for the best texture. Each slice should reveal the beautiful butter swirls and that perfect balance of sweetness from the honey and richness from the butter. Store leftovers in an airtight container for up to 3 days or freeze for longer storage. The flavor actually improves slightly as it sits!
Pro Tips For Making Amish Friendship Sourdough Bread
- STRETCH THE DOUGH: The Amish version relies on a tight, elastic dough—don’t skimp on the 10-minute stretch-and-fold sessions. After mixing, let it rest 20 minutes at room temp, then work it like you’re kneading, just with less force. I used to rush this, and the bread turned out dense; now I treat it like a lazy yoga session for my dough.
- MEASURE HONEY BY WEIGHT: Granulated honey packs differently than sugar, and this recipe isn’t forgiving. Use a digital scale for the ¼ cup—aim for 65 grams. Spooning it straight from the jar adds too much air, which can make the crumb uneven. (Yes, I learned this after a lopsided loaf that looked like it had a hunchback.)
- BUTTER TEMP MATTERS: Softened butter (65°F/18°C) blends better into the dough, but don’t microwave it—it melts faster than you think. Cut the cold butter into small cubes and let it sit on the counter for 15 minutes before mixing. Overworked butter = greasy bread; underworked = dry pockets. I now use a timer and a glass of wine to wait patiently.
- PROOF IN COOL SPACE: Skip the oven for proofing—this isn’t brioche. Place the shaped dough in a lightly oiled bowl, cover it with a damp towel, and let it rise in the fridge overnight (12–16 hours). The slow rise develops deeper flavor and a tighter crumb. I was skeptical until I tried it: the texture is noticeably better, and the honey caramelizes more richly. (Your future self will thank you.)
Common mistakes when making this recipe
Over-Mixing the Dough
One of the most common mistakes is over-kneading the dough, which develops too much gluten and results in a tough, chewy texture instead of the tender crumb we want. The dough should be just until it springs back slowly when poked—about 5-7 minutes of kneading.
I’ve seen beginners add extra flour to prevent sticking, but this can make the bread dense. Instead, wet your hands and keep the dough slightly sticky for that signature Amish tenderness. 💫
Using Inactive Starter
An inactive sourdough starter is the fastest way to ruin your bread—it won’t rise properly, leaving you with a flat, dense loaf. Always check for active bubbles and a slightly tangy aroma before using.
If your starter isn’t ready, feed it with equal parts flour and water (1:1 ratio) and wait 4-6 hours for it to become bubbly. I keep a backup starter in the fridge and feed it every 7 days to ensure it’s always ready.
Skipping the Rest Periods
Rushing the 10-minute rest after mixing or the 20-minute rest before shaping leads to uneven texture and poor rise. These short rests allow the gluten to relax, making the dough easier to handle and ensuring those beautiful swirls form cleanly.
I’ve learned the hard way—skipping these steps can cause the butter to leak out during baking, leaving you with a greasy mess instead of golden swirls.
Incorrect Proofing Conditions
Proofing is where flavor and texture develop, so getting it wrong is a game-changer. If your kitchen is too cold (68°F or below), the dough may take 2-3 hours to rise.
Too warm (78°F or above), and it could overproof in 30 minutes, collapsing when baked. Use an oven with the light on or a proofing box if your kitchen is inconsistent. I proof my dough in a turned-off oven with the light on for predictable results.
Overloading the Butter
Adding too much butter (more than 1 tablespoon per log) can cause the dough to tear or the butter to ooze out during baking. Stick to the ½ cup total for all four loaves and use 1-inch cubes for even melting.
If your butter melts too quickly, chill the dough for 15 minutes before baking to help it set. Trust me, a little butter goes a long way for those perfect swirls.
Baking Without a Thermometer
Guessing the doneness of your bread leads to either underbaked (gummy) or overbaked (dry) results. Always use an instant-read thermometer to check for an internal temperature of 190°F. The crust should be deep golden brown with a crackly texture.
I’ve burned bread waiting for the perfect color—don’t make that mistake! A thermometer takes the guesswork out of baking. 🔥
Nutrition facts
Frequently asked questions
Why does this bread need a sourdough starter?
The sourdough starter creates natural fermentation that gives this bread its signature tangy depth and airy texture. Unlike commercial yeast, wild fermentation develops complex flavors over time. For beginners, King Arthur's sourdough starter kit makes this process foolproof—just follow the feeding schedule for 5-7 days before using. The starter also acts as a natural preservative, keeping your bread fresh longer.
Can I make this recipe without honey?
Yes! Swap the ½ cup honey for ¼ cup maple syrup or ¼ cup unsweetened applesauce for a milder sweetness. For a savory version, omit the honey entirely and add 1 teaspoon cinnamon or ½ teaspoon cardamom to the dough. The butter swirls will still create delicious flavor layers without the sweetness.
How do I know when the butter swirls are ready to bake?
The butter swirls should be cold but pliable when you shape the dough—like soft butter, not melted. If they feel too firm, let them sit at room temperature for 5-10 minutes before using. During baking, they'll melt just enough to create those golden streaks. For extra shine, brush the baked loaves with whole milk after 15 minutes in the oven.
Can I use this recipe for a Dutch oven?
Shape the dough into a round boule instead of logs, and bake in a preheated 475°F Dutch oven for 35-40 minutes. The Dutch oven traps steam, creating a crusty exterior and open crumb. For swirls, place 1 tablespoon butter cubes in the center before shaping. Let the dough rise until it overflows the Dutch oven slightly for that classic Amish look.
Why does my bread taste bland?
Bland flavor usually means the starter wasn't active enough or the dough didn't rest long enough. Always use a bubbly, tangy starter and let the dough proof until it's doubled in size. For extra flavor, add 1 teaspoon cinnamon or ½ teaspoon vanilla extract to the dough. A longer proof (up to 2 hours) in a warm spot also enhances depth.