
Side Dishes
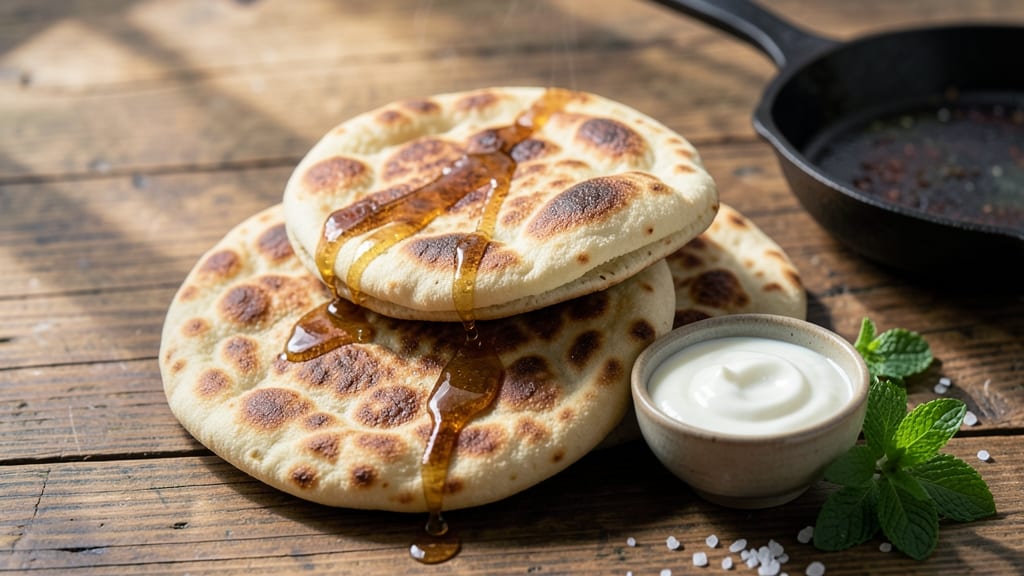
This African chapati bread recipe delivers soft, pillowy flatbreads that transform any meal into a flavorful experience. 💛 The secret lies in a simple dough that combines flour, oil, and a touch of salt—no yeast required—for a quick yet satisfying result.
Perfect for pairing with stews, curries, or serving as a wrap, these chapati are a staple in many African households.
What sets this recipe apart is its simplicity and versatility. With just a few ingredients and minimal effort, you can achieve perfectly soft, slightly crispy edges that stay tender inside.
The dough comes together in minutes, and each chapati cooks in under two minutes on a hot skillet, making it ideal for busy weeknights or special gatherings.
By the time you finish shaping and cooking, you’ll have a stack of golden-brown chapati that are flaky yet soft—ideal for soaking up sauces or wrapping your favorite fillings.
The aroma alone will make your kitchen feel like a bustling African market, and the texture is a perfect balance of crisp and tender.
Serve these chapati fresh with spicy curries, hearty stews, or even as a side to grilled meats. The possibilities are endless, and the process is foolproof—perfect for both beginners and seasoned cooks alike.
Ingredients for african chapati bread
Seven simple ingredients transform into fluffy, golden chapati—no yeast needed!
| Ingredient | Amount | Notes |
|---|---|---|
| All-Purpose Flour 🌾 | 3 cups | Plus 2 tbsp for dusting |
| Vegetable Oil 🫒 | ½ cup | Or melted ghee for flavor |
| Warm Water 💧 | 1 ¼ cups | 110°F for best texture |
| Salt 🧂 | 1 tsp | Fine sea salt preferred |
| Whole Milk 🥛 | ¼ cup | Full-fat for richness |
| Plain Yogurt 🍶 | ¼ cup | Greek yogurt works too |
| Ghee 🧈 | 1 tbsp | For cooking chapati |
The flour is your foundation—King Arthur or Bob’s Red Mill brands work best for that tender crumb. Warm water (not hot!) is key—feel like bathwater, not boiling. I always grab whole milk from the dairy section, but oat milk works if you're avoiding dairy. The yogurt adds that signature tang—Fage Greek yogurt gives the best texture, but plain yogurt in a squeeze bottle is fine too. For the ghee, store-bought is perfect—no need for homemade unless you're feeling fancy. Indian or African grocery stores usually have it pre-packaged for convenience.
No warm water thermometer? Test with your wrist—should feel warm but not hot. Short on yogurt? Substitute with extra milk and 1 tsp lemon juice. Want to skip ghee? Vegetable oil or butter works, though ghee gives that authentic flavor. The dough should be soft but not sticky—add 1 tbsp more flour if needed. Pre-shaping is where the magic happens: roll each piece into a ball, then flatten gently with your palm before cooking. Don’t overwork the dough—it’ll get tough!
Fresh chapati reheat beautifully—wrap in a clean towel and warm in a dry skillet for 30 seconds. Store dough balls covered in the fridge for up to 2 days or freeze for 1 month. Thaw overnight in the fridge before cooking. The secret to crispy edges? Hot skillet and quick cooking—each chapati should take under 2 minutes per side. Batch cook and stack with parchment between layers to keep them soft. Leftovers? Toast in a toaster oven for a crispy snack!
Why You'll Love This Recipe
- Five-Ingredient Magic: I swear by this—just flour, oil, warm water, salt, and milk. No fancy pantry trips, no measuring cups that never fit right. Honestly, I’ve made it on a camping stove and a stovetop; it’s that unfussy.
- Golden Crisp Secret: That first bite? Buttery, pillowy center with a crackling edge—like a cross between a flatbread and a soft cookie. The milk keeps it tender, but the oil gives it that just-cooked satisfaction that’s hard to resist.
- Breakfast to Snack: I eat these with jam for breakfast, wrap them around grilled chicken for lunch, and even toast them for a quick snack. (Yes, even on a Tuesday night.) They reheat perfectly, so they’re my go-to for lazy mornings or last-minute cravings.
- Budget-Friendly Staple: A batch costs me pennies and feeds my family for days. Store them in a cloth bag, and they stay fresh longer than store-bought bread—no sad, stale leftovers here. Plus, the ingredients? Always in my pantry.
Step-by-step instructions for African chapati bread
Here's how to make these soft, pillowy flatbreads that come together faster than you can say "chapati"!
👨🍳 Step 1: Mix the Dough to Perfection
In a large bowl, combine the 3 cups all-purpose flour, 1 tsp salt, and 0.25 cup plain yogurt. Mix with your fingers or a wooden spoon until you see small crumbs forming—this is called "roughing up" the flour. Here's the thing: we're not making bread dough here, so don't overwork it.
Next, add the 0.5 cup vegetable oil and 0.25 cup whole milk to the bowl. Pour in the 1.25 cups warm water (about 110°F) and mix everything together using your hands. The dough should start to come together but will still feel slightly sticky—this is normal! If it's too dry, add 1-2 teaspoons of water at a time until it holds together when pressed.
👨🍳 Step 2: Knead and Rest for Ideal Texture
Lightly flour a clean surface and turn out the dough. Knead gently for 3-4 minutes until smooth and elastic. You're not going for bread dough tightness—think more like soft cookie dough. The dough should be slightly tacky but not sticky.
Divide the dough into 4 equal balls (about 4 ounces each) and cover with a damp towel. Let them rest for 20-30 minutes at room temperature. This resting period is crucial—it relaxes the gluten and makes rolling easier. I know it seems like a long wait, but trust me, it makes all the difference in the final texture.
🔥 Step 3: Roll and Cook to Golden Perfection
Heat a clean skillet or griddle over medium-high heat. Place 1 tbsp ghee in the pan and swirl to coat the surface evenly. Once the ghee is hot (it should sizzle when you add a drop of water), carefully place one dough ball in the center.
Using a rolling pin, roll the dough outward from the center in gentle, even strokes to create a 6-inch circle (about ¼-inch thick). The edges should be slightly thicker than the center—this creates that beautiful, slightly puffed chapati shape. Roll quickly but firmly; chapati dough doesn't need much time to flatten.
🍳 Step 4: Cook Until Golden and Puffed
When the chapati is rolled, immediately flip it into the hot ghee. Cook for 30-45 seconds on each side until golden brown spots appear and the dough puffs up slightly. Here's where it gets fun—watch for the edges to start curling up. That's your signal to flip again.
For extra flavor, I like to sprinkle a pinch of salt on each cooked chapati right after removing from the pan. Transfer to a clean kitchen towel to keep them soft. Repeat with the remaining dough balls, adding more ghee to the pan as needed (about ½ tbsp per chapati).
⏰ Step 5: Serve Warm and Enjoy Immediately
Serve the chapati warm, stacked with a little extra ghee drizzled on top. They're best enjoyed right away while still soft and pillowy. If you need to store them, keep in an airtight container for up to 2 days—just reheat in a dry skillet for 10-15 seconds per side to restore their warmth.
These chapati are incredibly versatile—use them with curries, as wraps, or even as a side for soups. The secret to their softness lies in the yogurt and milk, which keep them tender while the ghee adds that rich, authentic flavor. You've just made restaurant-quality chapati in your own kitchen!
Pro Tips For Making African Chapati Bread
- Heat the Pan Properly: African chapati needs a screaming-hot skillet—no half-measures. I used to think "medium-high" was enough, but the dough sticks and flattens like a sad pancake. Now I let the pan sit for 2-3 minutes after turning the burner to max, then test with a drop of water (if it sizzles violently, you’re ready). The first 30 seconds of cooking are where all the magic happens.
- Use Warm Milk, Not Cold: Cold milk makes the dough tough and chewy—trust me, I’ve ruined batches. Warm the milk to just under body temperature (like a warm bath, not a latte) before mixing. This helps the gluten relax and creates a tender, pillowy chapati. Pro move: Microwave for 20 seconds, then let it sit while you mix.
- Roll Thin and Even: Uneven thickness = burnt edges, raw centers. Roll the dough to about ¼-inch thickness (or slightly thinner if you’re confident), and rotate it 90 degrees every few turns for a perfect circle. I learned this after making lopsided chapatis that looked like they’d been attacked by a toddler with a rolling pin.
- Rest the Dough 30 Minutes: Skipping the rest makes the dough fight you. After mixing, cover the bowl and let it sit—this relaxes the gluten so rolling becomes a breeze. I was skeptical until I tried it: the dough stretches smoothly, and the final chapati puffs up like it’s supposed to. (Yes, even if you’re impatient like me.)
Serving suggestions for this recipe
Curry Pairings
Chapati shine brightest with rich, aromatic curries like East African chicken curry or Kenyan beef stew. The soft texture soaks up flavors beautifully—I love serving them with a coconut-based curry that has a hint of chili.
For a vegetarian option, pair with lentil dal and fresh cilantro. The key is balancing the heat of the curry with the mild sweetness of the chapati. 💛
Stew Complements
Heartier stews like West African peanut soup or Ethiopian misir wot become even more satisfying with warm chapati. The dough's pillowy texture contrasts perfectly with the chunky stew ingredients.
I often serve chickpea and spinach stew with extra ghee-drizzled chapati for dipping. For a protein boost, add grilled chicken or lamb to your stew plate alongside the bread.
Wrap Potential
Use chapati as edible wraps for African-style shawarma or spiced ground beef. Simply spread a thin layer of garlic yogurt sauce on the warm chapati, add your filling, and roll tightly. This works especially well with chicken shawarma or beef rendang.
For a vegetarian option, try mushroom and peanut filling wrapped snugly in the bread. The secret is keeping the chapati warm while assembling.
Breakfast Twist
Turn chapati into a breakfast star with scrambled eggs or African-style omelets. Tear warm chapati into pieces and serve with tomato and onion omelets or sautéed liver and onions.
The crispy edges add texture contrast to soft eggs. For a sweet option, spread with honey and cinnamon, then top with banana slices for a quick breakfast treat.
Dessert Accents
While unusual, chapati can elevate desserts when toasted lightly. Serve with African custard or mango purée for dipping. The subtle sweetness of the toasted bread complements tropical fruits beautifully.
For a festive touch, arrange chapati pieces in a circle with date and nut filling in the center—this creates an impressive centerpiece for celebrations.
Global Fusion Ideas
Get creative with global pairings! Serve with Indian chutneys and pickled vegetables for a fusion spread. The chapati works surprisingly well with Mexican-style salsa and queso fresco for a quick lunch.
For a Mediterranean twist, pair with hummus and roasted vegetables. The dough's neutral flavor makes it a perfect canvas for bold global flavors. ✨
Nutrition facts
Frequently asked questions about African chapati bread
Why does my chapati dough stick to the rolling pin?
The dough should be slightly sticky but not wet. If it's sticking too much, you likely need 1-2 tablespoons more flour when kneading. Try dusting your rolling pin and surface with extra flour, but don't overdo it—too much flour makes chapati tough. Work quickly when rolling to prevent sticking from moisture.
Can I make chapati without ghee?
Replace ghee with vegetable oil, butter, or coconut oil—they all work well. For best flavor, use melted butter or a mix of oil and butter. The key is keeping the pan hot for that signature crispy edge. Just add ½ tablespoon of oil per chapati to the skillet before cooking.
How do I prevent chapati from tearing when rolling?
Let the dough rest for the full 20-30 minutes before rolling—this relaxes the gluten. Keep your rolling pin moving in one direction and apply gentle, even pressure. If the dough cracks, simply press the edges together lightly. For extra help, roll from the center outward, keeping the chapati slightly thicker at the edges.
What's the best way to reheat leftover chapati?
Wrap leftover chapati in a damp paper towel and microwave for 10-15 seconds—this restores moisture. For crispier results, heat in a dry skillet over medium heat for 20-30 seconds per side. Never reheat in the oven alone, as it makes them rubbery. The best method is a mix of both: skillet for crispiness, then microwave for softness.
Can I make chapati ahead of time?
Yes! Shape the dough balls and refrigerate for up to 2 days or freeze for 1 month. To cook from frozen, thaw overnight in the fridge, then cook as usual. For refrigerated dough, let it sit at room temperature for 10 minutes before rolling. The texture will be slightly firmer but still delicious when reheated properly.