
Side Dishes
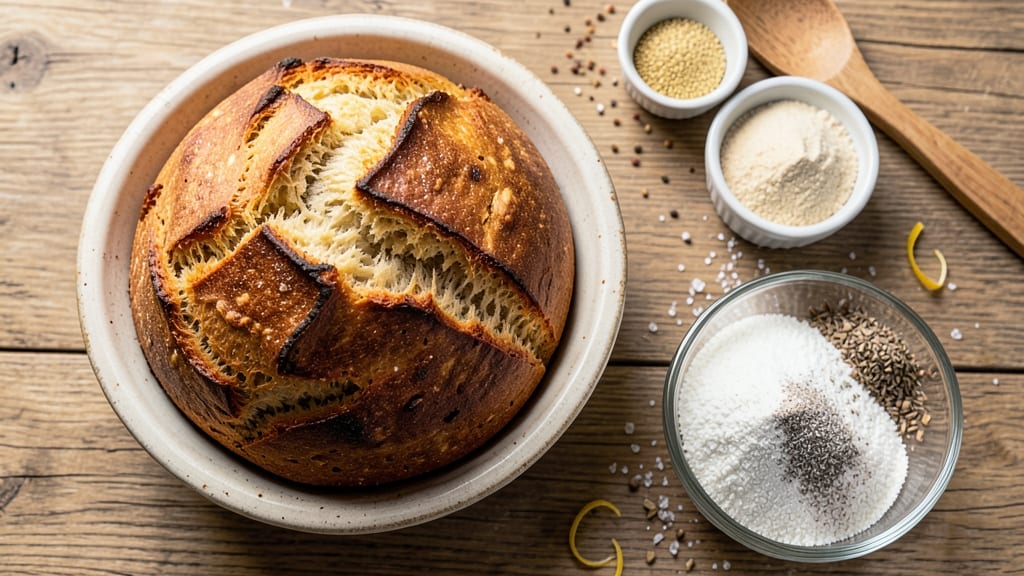
This amazing gluten-free bread recipe finally delivers that perfect combination of fluffy rise and crispy crust—without a single grain of wheat. I've tested countless blends, and this one consistently produces bread that's light, airy, and holds up like traditional loaves.
The secret? A mix of almond flour for structure, rice flour for tenderness, and a touch of psyllium husk to mimic gluten's elasticity. No more dense, crumbly loaves that fall apart at the first slice.
What makes this recipe work is the two-stage rising process—first a quick room-temperature rise, then a longer cold proof in the fridge. This helps develop flavor and creates that signature oven-spring you crave in bread.
I also use xanthan gum (just ¼ teaspoon!) to bind everything together, giving you that satisfying chew without the gluten. The crust gets beautifully golden and crispy, while the interior stays soft and pillowy for days.
By the time you pull this loaf from the oven, you'll have bread that's restaurant-quality—perfect for sandwiches, toast, or serving with butter and jam. The best part? It's adaptable to any gluten-free diet (with or without eggs/dairy) and freezer-friendly for when you need a quick solution.
No more sacrificing texture for health—this bread proves gluten-free can taste just as good.
Whether you're baking for a family with dietary restrictions or simply craving fresh bread without the gluten, this recipe delivers. Let's get started—your kitchen (and taste buds) will thank you.
Ingredients for amazing gluten free bread
This gluten-free blend delivers restaurant-quality texture without a single grain of wheat.
| Ingredient | Amount | Notes |
|---|---|---|
| Almond Flour 🌰 | 1 ½ cups | Finely ground, unsweetened |
| White Rice Flour 🍚 | 1 ½ cups | Superfine grind preferred |
| Psyllium Husk Powder 🌿 | ½ tsp | Pure, unsweetened |
| Xanthan Gum 🧪 | ¼ tsp | Pure, powdered form |
| Active Dry Yeast 🍞 | 1 tsp | Fresh or packet form |
| Granulated Sugar 🍚 | 1 tbsp | For yeast activation |
| Warm Water 💧 | 1 cup | 110°F for yeast activation |
| Large Eggs 🥚 | 2 whole | Room temperature |
| Unsalted Butter 🧈 | ¼ cup | Softened, full-fat |
| Salt 🧂 | 1 ½ tsp | Diamond Crystal preferred |
| Apple Cider Vinegar 🍏 | 1 tsp | For elasticity |
| Olive Oil 🫒 | 2 tbsp | Extra-virgin for richness |
The almond flour is non-negotiable here—it's what gives that satisfying chew and structure. Bob's Red Mill or King Arthur brands are my go-tos for consistent texture. Rice flour? Superfine grind is key—it blends better and avoids that gritty texture. Psyllium husk might sound weird, but it's the secret to that gluten-like elasticity. Now Foods makes a pure powder that works perfectly. For the yeast, always check the expiration date—old yeast is the #1 reason gluten-free bread fails. And trust me, the xanthan gum is worth the tiny amount—it's what makes this hold together like traditional bread.
No almond flour? Coconut flour at half the amount plus extra egg works in a pinch, but texture will differ. Swapping rice flour for oat flour? Use the same quantity, but expect a nuttier flavor. Butter hater? Coconut oil or avocado oil works just as well. The vinegar adds tang and helps with browning—don't skip it! For the water, 110°F is ideal—too hot kills yeast, too cold slows activation. And if you're making this ahead, freeze the dough before the second rise—it keeps for months and bakes straight from frozen.
This dough is a beast—it needs time. After mixing, let it sit 1 hour before shaping. Then, cold proof overnight for maximum flavor. The crust? Brush with olive oil and a sprinkle of salt before baking for that perfect crunch. Room temperature loaf bakes in 40-45 minutes, frozen takes 50-55. Slice while still warm for clean cuts. Leftovers? Toast or freeze—this bread stays fresh for 5 days or 3 months frozen. Worth every minute of waiting.
Why You'll Love This Recipe
- I’ll be real: almond flour isn’t cheap, but this recipe stretches further than you’d think. The rice flour keeps costs down, and one loaf lasts my family days—especially when we’re sneaking slices into sandwiches or charcuterie boards. Practical? Absolutely. Worth it? Even more.
- No-Mix Madness: I swear by this recipe because the almond flour and rice flour blend requires zero kneading—just mix, let the psyllium husk powder do its magic, and you’re golden. That psyllium? It’s the secret weapon that holds everything together without the fuss of gluten.
- Nutty Crunch Surprise: Honestly, the almond flour gives this bread a textural upgrade—soft inside, with just enough crunch to keep it interesting. It’s not your basic dry gluten-free loaf; it’s got depth, like a hug from your favorite bakery but without the guilt.
- Weeknight Workhorse: This bread thrives on lazy days. Toast it for breakfast, slather it with butter for lunch, or use it to soak up soup broths—it’s my go-to when I’m too tired to think. And between us? It freezes like a dream for when you really don’t want to bake.
Step-by-step instructions for gluten-free bread with perfect rise and crust
This method delivers bakery-style gluten-free bread with a light, airy crumb and crisp golden crust—no compromises.
Activate the Yeast and Mix Wet Ingredients
In a small bowl, combine the 1 cup warm water (about 110°F), 1 tbsp granulated sugar, and 1 tsp active dry yeast. Let it sit for 5-7 minutes until frothy—this confirms your yeast is active. If nothing happens after 10 minutes, start over with fresh yeast.
In a separate large bowl, whisk together the 2 whole large eggs, 0.25 cup softened unsalted butter, 2 tbsp extra-virgin olive oil, 1.5 tsp salt, and 1 tsp apple cider vinegar until smooth. The vinegar adds elasticity that gluten-free dough desperately needs. This mixture should be creamy but not overly thick—if it looks too stiff, add 1-2 teaspoons of warm water to loosen it.
Combine Dry Ingredients and Form the Dough
In a medium bowl, sift together the 1.5 cups almond flour, 1.5 cups white rice flour, 0.5 tsp psyllium husk powder, and 0.25 tsp xanthan gum. The psyllium husk mimics gluten's binding properties, while xanthan gum adds structure. Whisk vigorously to eliminate any lumps—this ensures an even texture in your finished bread.
Gradually add the dry mixture to the wet ingredients, mixing with a wooden spoon or rubber spatula until just combined. Avoid overmixing—you're aiming for a thick, sticky batter that clings slightly to the spoon. The dough will be much stickier than traditional bread dough, so don't panic if it looks unruly. If it's too thick, add 1 teaspoon of warm water at a time until it reaches a thick batter consistency.
First Rise and Prepare the Loaf Pan
Lightly grease a 9x5-inch loaf pan with olive oil or line it with parchment paper. Pour the dough into the prepared pan and smooth the top with a wet spatula. Cover the pan tightly with plastic wrap and let it rise at room temperature for 1 hour, or until the dough has visibly doubled in volume. This rise is crucial—it develops the bread's structure without gluten.
Here's the thing—gluten-free dough doesn't rise as dramatically as wheat dough, so don't expect a huge dome. Instead, look for the edges to pull away slightly from the pan and the center to puff up about 1/3 of its original height. If your kitchen is cold, place the pan in a slightly warmed oven (70°F) to encourage better rise.
Shape and Second Rise for Maximum Height
Preheat your oven to 375°F. Carefully remove the risen dough from the pan and place it on a piece of parchment paper. Gently shape it into a rectangular loaf, about 3 inches tall, using wet hands to prevent sticking. The dough will be soft and pliable—handle it gently to avoid deflating the air pockets you've created.
Place the shaped loaf back in the greased pan and let it undergo a second rise for 20-25 minutes. You'll know it's ready when the dough springs back slowly when gently pressed with a finger. This final rise ensures that airy texture we're after. While it rises, position a baking sheet on the middle rack of your oven and place an empty metal bowl on the lower rack. This creates steam during baking, which is essential for that crisp crust.
Bake to Golden Perfection with Steam
Bake the loaf for 45-50 minutes until the top is deep golden brown and sounds hollow when tapped on the bottom. The internal temperature should reach 205°F at the center. During the first 15 minutes, you'll see steam rising from the bowl on the lower rack—this is working its magic to create that crisp crust.
If the top browns too quickly, loosely tent the loaf with aluminum foil to prevent over-browning while allowing steam to continue circulating. The bread is done when it has a beautiful golden crust and pulls away cleanly from the sides of the pan. Let it cool in the pan for 10 minutes, then transfer to a wire rack to cool completely. This resting period allows the crumb to set properly—cutting it too soon will result in a gummy texture. The finished loaf should have a crisp exterior and a tender, slightly dense crumb with visible air pockets. Slice it thickly for the best texture—each bite should deliver that satisfying crunch followed by a moist, flavorful interior.
Pro Tips For Making Amazing Gluten Free Bread
- Mix the psyllium last: The almond and rice flours will clump like angry snowballs if you toss the psyllium in too early. Save it for the final 30 seconds of mixing—just splash in the water, then fold it in with a spatula until the dough holds together. No more sticky messes fighting your mixer.
- Let the yeast nap: Gluten-free yeast is lazy—it needs a full 10 minutes in warm water (110°F) with a pinch of sugar to wake up properly. I used to skip this, and my bread would rise like a sad balloon. No rush; let it bubble before adding the dry ingredients.
- Don’t overproof the dough: This isn’t wheat bread—it’ll collapse faster than your patience if you let it rise past the "just doubled" mark. Set a timer for 45–60 minutes max, then check. Overproofed gluten-free dough turns gummy, not airy.
- Use a thermometer for the oven: That "375°F" setting is a lie. Preheat to 350°F and bake with a thermometer—gluten-free bread burns faster than it rises. I learned this after charring three loaves. A little patience here means no sad, crispy edges.
Essential equipment for amazing gluten free bread
Must-Have Mixing Tools
First up, you'll need a stand mixer with paddle attachment—this is non-negotiable for gluten-free bread. The sticky dough requires strong mixing power, and my KitchenAid Artisan Series handles it beautifully.
If you don't have a mixer, a hand mixer with dough hooks works, but be prepared for some elbow grease. For the dry ingredients, a fine-mesh sieve prevents lumps and ensures even distribution of your flours and gums.
I swear by the OXO Good Grips—it's sturdy and makes short work of sifting. 💪
Precision Baking Gear
An instant-read thermometer is your new best friend—baking gluten-free bread requires exact temperatures. I use a Thermoworks Thermapen ONE to monitor both dough temperature and oven heat. For shaping, wet silicone baking mats prevent sticking better than any flour dusting.
The Kitchy Silicone Mat is my go-to because it's easy to clean and reusable. Don't forget a 9x5-inch loaf pan—I prefer Nordic Ware for its even heat distribution and nonstick surface.
Rise and Proof Essentials
Gluten-free dough needs patience, which is why a proofing box or warm oven (set to 70°F) is ideal for the first rise.
I use a Breville Proofing Box for consistent results, but a simple baking stone on the middle rack with a pan of hot water works in a pinch.
For the second rise, a digital timer ensures you don't over-proof—set it for 20-25 minutes max. Pro tip: Use a lightweight spatula to test doneness by gently pressing the dough—it should spring back slowly.
Steam and Crust Control
Creating that perfect crust requires steam, which means you'll need an oven-safe metal bowl (like a Pyrex measuring cup) to place on the lower rack. This generates steam during the first 15 minutes of baking, crucial for that crisp exterior.
For brushing the crust, keep extra-virgin olive oil and a pastry brush handy—I love the West Bend brush for its sturdy bristles. A wire cooling rack is also essential—it prevents soggy bottoms while the bread cools.
Storage and Slicing
Once baked, store your loaf in an airtight container (I use Glasslock containers) to maintain freshness. For slicing, a serrated bread knife is a game-changer—it glides through the crust without crushing it. My Mercer Culinary Genesis has a scalloped edge that gives clean cuts every time.
If freezing, wrap the cooled loaf tightly in plastic wrap and place it in a freezer bag to prevent freezer burn. Thaw overnight in the fridge for the best texture. ✨
Nutrition facts
Frequently asked questions
Why does gluten-free bread often taste bland?
Without gluten, flavor gets lost in the texture battle. This recipe solves that with apple cider vinegar (adds tang) and olive oil (richness). The psyllium husk also helps trap flavors better than traditional flours. For extra depth, try adding 1 tsp garlic powder or dried herbs to the dough before baking.
Can I make this without eggs?
Replace the 2 eggs with 2 tbsp ground flaxseed + 6 tbsp water (let sit 5 minutes to thicken). For binding, add 1 extra tbsp psyllium husk powder. The texture will be slightly denser but still delicious. The vinegar and xanthan gum help compensate for the egg's structural role.
How do I fix dense gluten-free bread?
Dense bread usually means one of three things: overmixing (stop when just combined), underproofed dough (give it 10 extra minutes for the second rise), or too much flour (stick to the measurements—gluten-free dough needs less). The steam trick during baking is also critical—skip the bowl on the lower rack, and you'll lose that crispy crust and light interior.
What's the best way to reheat gluten-free bread?
Wrap slices in a damp paper towel and warm in a 350°F oven for 5-7 minutes for toast-like crispiness. For sandwiches, lightly toast the bread before assembling. Microwaving works in a pinch (10 seconds), but it kills the crust. The secret to reheating is moisture—dry heat alone makes gluten-free bread turn rubbery.
Can I use this dough for dinner rolls?
Yes! Divide the dough into 12 equal balls (about 2 oz each) and place on a baking sheet. Let rise 30-40 minutes until puffy, then bake at 375°F for 12-15 minutes until golden. For extra flavor, brush with garlic butter before baking. The psyllium husk gives them a satisfying chew that holds up to juicy fillings like chicken or veggies.