
Side Dishes
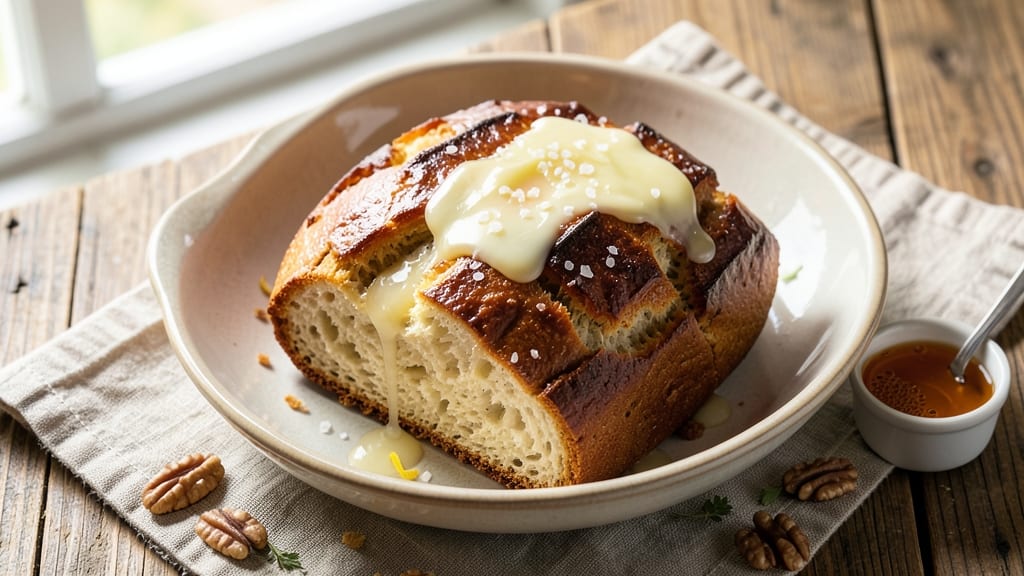
This apple cider vinegar bread recipe transforms ordinary loaves into something extraordinary—tangy, tender, and surprisingly fresh for days. The secret lies in apple cider vinegar, which enhances flavor, improves texture, and extends shelf life, making every slice taste like it was just baked.
I’ve perfected this recipe over years of testing, and the results speak for themselves: a crust that crackles, a crumb that’s impossibly soft, and a subtle tang that elevates everything from toast to sandwiches.
The beauty of this recipe is in its simplicity. With just five core ingredients and 30 minutes of active prep, you’ll have a loaf that rivals artisanal bread without the fuss.
The vinegar plays a dual role: it tenderizes the dough while adding depth, and it acts as a natural preservative, keeping your bread fresh for up to a week. No fancy equipment is needed—just a bowl, a whisk, and your oven.
The dough ferments overnight, which develops flavor and makes the bread easier to digest, but even a quick version works in a pinch.
What you’ll end up with is a loaf that’s golden, fragrant, and impossibly light, with a crust that’s crisp enough to satisfy even the most discerning bread lovers. The tangy aroma fills your kitchen as it bakes, and the first bite delivers that perfect balance of sweetness and acidity.
This bread isn’t just for toast—it’s the star of your table, whether you’re serving it with butter, jam, or as the perfect vessel for soups and salads.
For those who love customization, you can sweeten the dough with honey or add seeds for extra texture. The recipe scales easily, so you can bake a single loaf or double the batch for gifts.
Once you try this, store-bought bread will never taste the same again. Let’s get started on making bread that’s as impressive as it is delicious.
Ingredients for apple cider vinegar bread
Five core ingredients, one tangy secret—this bread rivals artisanal loaves with minimal effort.
| Ingredient | Amount | Notes |
|---|---|---|
| Apple Cider Vinegar 🍏 | 1 tbsp | Raw, unfiltered preferred |
| All-Purpose Flour 🌾 | 4 cups | Unbleached, high protein preferred |
| Granulated Sugar 🍬 | ¼ cup | Or honey for subtle sweetness |
| Instant Yeast 🍞 | 2 tsps | Ensure freshness by checking date |
| Salt 🧂 | 1 tsp | Fine sea salt preferred |
| Unsalted Butter 🧈 | ½ cup | Cold, cubed for dough |
| Warm Water 💧 | 1 ¼ cups | 110-115°F for activation |
| Cornmeal 🌽 | ¼ cup | For dusting baking sheet |
| Sesame Seeds 🌰 | 1 tbsp | Optional for topping |
| Coarse Sea Salt 🧂 | 1 tsp | For sprinkling crust |
The apple cider vinegar is non-negotiable here. Bragg or Texas Pete work perfectly, but avoid anything with added flavors or colors. Most grocery stores carry it in the condiment aisle next to salad dressings. If you're feeling fancy, grab a small bottle of raw, unfiltered vinegar—it has more flavor complexity. The flour matters too: King Arthur or Bob's Red Mill are my go-tos for consistent results. They both have higher protein content, which gives you that perfect chewy crumb. Check your flour's expiration date—old flour loses lift, and you'll end up with a dense loaf. For the butter, I always use Plugrá or Land O'Lakes unsalted—they're consistent and affordable.
No apple cider vinegar? White vinegar or lemon juice in a pinch, but the flavor won't be quite the same. Running short on instant yeast? Active dry yeast works too, just let it proof longer. The sugar can be swapped for honey or maple syrup—about one-third less quantity since they're more concentrated. For a seed topping, poppy seeds or flaxseeds work beautifully. If you're making this ahead, the dough can ferment in the fridge for up to 48 hours—just let it sit at room temp for 30 minutes before baking. The sesame seeds? Skip them if you're allergic, but they add that perfect crunch to the crust.
This bread keeps for 5-7 days at room temperature, wrapped in a clean kitchen towel. For longer storage, freeze the baked loaf for up to 3 months. I like to slice it before freezing—just thaw at room temp for 10 minutes. The crust stays crisp even after reheating. For serving, nothing beats a thin layer of unsalted butter or a smear of jam. The tangy flavor actually improves after the first day, so leftovers taste even better. Store any unused vinegar in a cool, dark place—it lasts forever.
Why You'll Love This Recipe
- No-Knead, No-Fuss: I swear by this—mix, let it rise, bake. That’s it. The apple cider vinegar does the heavy lifting, breaking down the gluten so the dough comes together smoother than my usual kneading disasters.
- Tangy Twist: That splash of apple cider vinegar? It’s magic. Gives the bread a bright, slightly sweet edge that pairs perfectly with butter—like a warm hug for your taste buds. (Yes, even on a Tuesday night.)
- Weeknight Hero: Toss in a loaf for breakfast, pack slices for lunch, or serve it with dinner. It’s my go-to when I’m too tired to think. The yeast works fast, so you’re not stuck waiting hours—just 20 minutes of hands-off rising.
- Budget Baking: Flour, sugar, vinegar—these are pantry staples that won’t break the bank. A single batch stretches for days, and the leftovers? Toast them, freeze them, or turn them into croutons. Zero waste, all flavor.
Step-by-step instructions for apple cider vinegar bread
This tangy twist on classic bread delivers a soft, airy crumb with a crisp crust that stays fresh for days.
Activate the Yeast with Apple Cider Vinegar
In a small bowl, whisk together the 1 tbsp apple cider vinegar, 1.25 cups warm water (between 110-115°F), 0.25 cup granulated sugar, and 2 tsps instant yeast. Let it sit for 5-10 minutes until it becomes frothy and bubbly—this tells you your yeast is alive and ready to work. If it doesn't bubble, your yeast might be expired, and you'll need to start over.
The apple cider vinegar here does double duty: it activates the yeast while adding that signature tangy flavor. The sugar helps feed the yeast, and the warm water creates the perfect environment for activation. Don't skip this step—proper yeast activation ensures a light, airy loaf instead of a dense one.
Mix the Dough with Butter and Flour
In the bowl of a stand mixer fitted with the dough hook, combine the yeast mixture with the 4 cups all-purpose flour and 1 tsp salt. Mix on low speed for 1 minute until combined. Add the 0.5 cup cold, cubed unsalted butter and mix on medium speed for 2-3 minutes until the dough begins to pull away from the sides of the bowl.
Switch to medium-high speed and knead for 4-5 minutes until the dough is smooth and elastic. It should be slightly tacky but not sticky—if it sticks to your fingers, add 1 tablespoon of flour at a time until it reaches the right consistency. The butter adds richness, but it also makes the dough slightly more difficult to handle, so be patient during kneading.
Let the Dough Rise for Maximum Flavor
Lightly grease a large bowl with a bit of olive oil (not in the ingredients, but trust me on this) and place the dough inside. Cover with a clean kitchen towel and let it rise in a warm place for 1-1.5 hours, or until it has roughly doubled in size. You'll know it's ready when you poke it gently with a finger and the indentation stays put.
The apple cider vinegar works its magic during this rise, developing that signature tang while the yeast ferments. Don't rush this step—proper rising time ensures a light, airy crumb. If your kitchen isn't warm enough, place the bowl near a slightly warmed oven (turned off) with a cup of hot water inside to create a warm, moist environment.
Shape and Second Rise for Perfect Texture
Turn the dough out onto a lightly floured surface and gently shape it into a 9x5-inch loaf pan. Brush the sides of the pan with a bit of melted butter (again, not in the ingredients but worth it) and sprinkle 0.25 cup cornmeal evenly over the bottom. This prevents sticking and adds a subtle crunch.
Cover the loaf pan with a towel and let it rise for another 30-45 minutes until it domes slightly above the pan. The second rise is crucial—it ensures that final burst of airiness. Preheat your oven to 375°F during this time so it's ready when your bread is. Sprinkle the 1 tbsp sesame seeds and 1 tsp coarse sea salt evenly over the top just before baking for that perfect crust.
Bake to Golden Perfection
Bake the bread for 30-35 minutes until it's deep golden brown and sounds hollow when tapped on the bottom. If the top browns too quickly, tent it loosely with aluminum foil to prevent over-browning while it continues to bake through. The internal temperature should reach 190-200°F when tested with an instant-read thermometer.
Remove from the oven and let the bread cool in the pan for 10 minutes before transferring it to a wire rack. This resting period prevents the bread from falling apart when you slice it. The crust should be crisp, the crumb soft and airy, and each slice should have that delightful tangy flavor from the apple cider vinegar. Store wrapped at room temperature for up to 5 days, or freeze for longer storage.
Pro Tips For Making Apple Cider Vinegar Bread
- STIR THE VINEGAR FIRST: Mix the apple cider vinegar with warm water before adding yeast—this guarantees the acidity won’t kill it on contact. I learned this the hard way after tossing a batch where the yeast just sat there like a lump of doughy regret.
- WEIGH YOUR FLOUR: Use a kitchen scale for the flour—1 cup of all-purpose flour isn’t always 120 grams, and this bread hates guessing. The texture changes fast when you’re off by even 10 grams, and you’ll know when it’s wrong (too dense or gummy).
- DON’T SKIP THE 10-MINUTE REST: Let the dough sit covered for 10 minutes after mixing—this relaxes the gluten so it rises evenly. I used to punch it down immediately, and the loaves always turned out lopsided or underproofed. Sounds weird, but it works.
- USE A THERMOMETER FOR WATER: The yeast needs water between 105°F and 110°F—any hotter and it dies, any cooler and it’s sluggish. I was boiling water for years until I realized even a 5-degree difference makes a noticeable lag in rise time. (Yes, even if you’re impatient like me.)
Troubleshooting this recipe
Dense or Gummy Texture
If your bread turns out dense or gummy, the issue is likely under-proofed yeast or too much flour. The apple cider vinegar can slow yeast activity slightly, so ensure your yeast is fresh and your water is between 110-115°F.
Over-kneading also causes density—stop when the dough is smooth but still slightly tacky. For next time, let the dough rise until it doubles in size and springs back slowly when poked. 🌟
Flat or Sunken Loaf
A flat or sunken loaf usually means the dough didn’t rise enough or the oven wasn’t hot enough. Double-check your yeast activation—it should be bubbly within 5-10 minutes. Place the dough in a warm spot (like a turned-off oven with a cup of hot water) for the first rise.
For the second rise, ensure the dough domes slightly above the pan before baking. Preheat your oven to 375°F and use an oven thermometer to confirm accuracy. ⚡
Pale or Pale Crust
A pale crust happens when the bread bakes too slowly or lacks sufficient moisture loss. Brush the top with egg wash (1 egg + 1 tbsp water) before baking for a golden finish. Increase oven temperature to 390°F for the last 5-10 minutes of baking.
Sprinkle coarse sea salt or sesame seeds right before baking to encourage browning. If your oven runs hot, tent the bread with foil after 20 minutes to prevent over-browning while ensuring even cooking. 🔥
Bread Sticks to Pan
Sticking occurs when the dough isn’t properly greased or dusted. Lightly grease your 9x5-inch loaf pan with butter or oil, then sprinkle cornmeal evenly on the bottom. Avoid flour—it can create a tough layer. For extra insurance, place a parchment paper square in the pan before adding the dough.
Let the bread cool in the pan for 10 minutes before transferring to a rack to avoid tearing the crust. ✨
Sour or Vinegary Flavor Too Strong
If the apple cider vinegar flavor dominates, you may have used too much or let the dough rise too long. Stick to 1 tbsp and reduce the second rise to 20-30 minutes if your kitchen is warm.
For a milder taste, replace half the vinegar with warm water. If the flavor is still overpowering, balance it with a sweet topping like honey or jam after baking. 🍯
Dough Too Sticky
Sticky dough usually means too much liquid or not enough flour. If the dough clings to your hands, add 1 tablespoon of flour at a time until it’s smooth but still slightly tacky. Avoid over-kneading—this can also make the dough sticky.
For a quicker fix, wet your hands slightly before handling the dough to prevent sticking. If the dough is too wet to shape, let it rest for 10 minutes before trying again. 💪
Nutrition facts
Frequently asked questions
Can I make this bread without a stand mixer?
You can mix the dough by hand in a large bowl using a wooden spoon or your hands. After combining the ingredients, knead on a lightly floured surface for about 8-10 minutes until the dough becomes smooth and elastic. The key is to be patient—it takes more effort than a mixer, but the result will be just as delicious.
Why does apple cider vinegar make the bread taste different?
The apple cider vinegar adds a subtle tanginess that enhances the bread's flavor while tenderizing the gluten. It also acts as a natural preservative, keeping your bread fresh longer. The acidity helps break down proteins in the flour, creating a softer crumb. Think of it as a secret ingredient that gives your bread a gourmet touch without overpowering the taste.
How can I tell if my yeast is still good?
Test your yeast by mixing 1 tsp with 2 tbsp warm water (110-115°F) and 1 tsp sugar. If it bubbles within 5-10 minutes, it's active. For this recipe, the vinegar and sugar combination should activate the yeast even if it's slightly older. If there's no reaction, your yeast is expired and needs replacing.
Can I add mix-ins like nuts or dried fruit?
Yes! Fold in ½ cup chopped walnuts, pecans, or dried cranberries during the final kneading stage. For best results, soak dried fruit in warm water for 10 minutes first to rehydrate it. Keep mix-ins to 10% of the total dough weight to avoid overloading the bread.
Why does my bread taste better after a day?
The apple cider vinegar continues to develop flavor as the bread sits. The acidity reacts with the bread's starches over time, creating a more complex taste. Additionally, the crust firms up slightly, making each slice taste fresher. For maximum flavor, store your bread wrapped in a kitchen towel at room temperature.