
Side Dishes
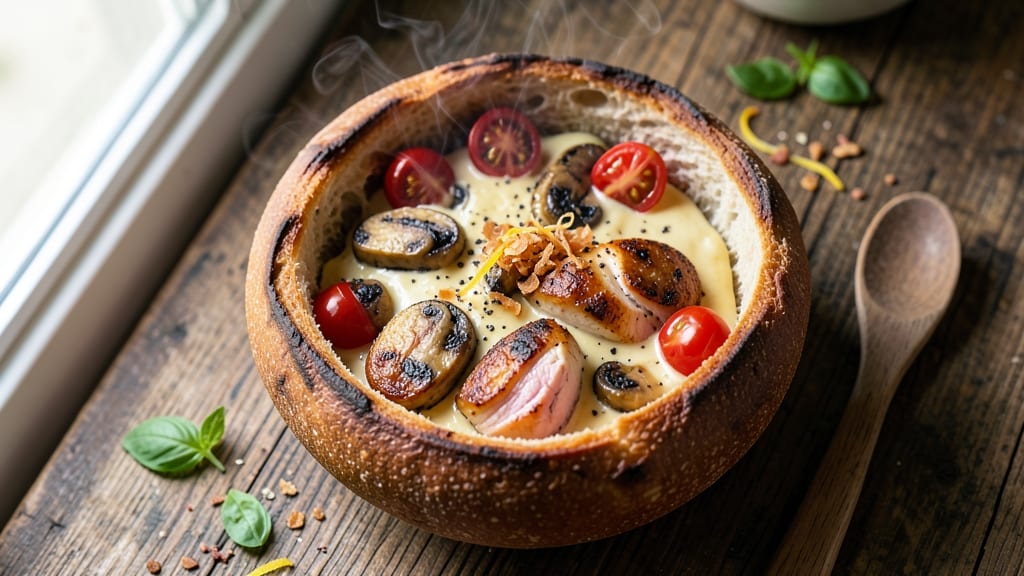
Transforming an artisan sourdough bread bowl into a creamy soup vessel is an art form that elevates everyday meals into an experience. This artisan sourdough bread bowl recipe delivers a crispy, hollowed loaf perfect for holding rich soups, chilis, or even cheese dips—all while keeping the bread warm and flavorful.
The secret lies in baking a loaf with a sturdy crust and a tender crumb, then carefully hollowing it to create a sturdy, edible bowl that holds up to even the heartiest fillings.
What sets this recipe apart is the balance between tradition and practicality. You’ll start with a foolproof sourdough starter (or use store-bought dough for convenience), shape it into a loaf with a thick base to support the hollowed center, and bake it until golden.
The hollowing process is simple but precise—removing just enough bread to create a bowl shape without compromising structural integrity. The result? A warm, aromatic vessel that absorbs the flavors of whatever you pour inside.
Once hollowed, your bread bowl becomes a canvas for creativity. Fill it with tomato basil soup, creamy chili, or even a savory stuffing of cheese and herbs.
The bread stays crispy on the outside while soaking up the creamy, flavorful fillings inside, turning a simple side into the star of the meal. Whether you're hosting a dinner party or just craving a cozy, interactive dish, this technique guarantees a showstopping presentation every time.
For those short on time, gluten-free adaptations are possible with alternative flours, though texture may vary. The key to success lies in patience—letting the dough ferment properly and hollowing the bread with care.
With this recipe, you’ll master the art of turning bread into a multipurpose, edible dish that’s as delicious as it is impressive.
Ingredients for artisan sourdough bread bowl
Four loaves, crispy crusts, and a secret for creamy soup perfection—just these ingredients transform bread into edible bowls.
| Ingredient | Amount | Notes |
|---|---|---|
| Active Sourdough Starter 🍞 | 1 cup | Unfed, room temperature |
| All-Purpose Flour 🌾 | 3 ½ cups | High-protein for structure |
| Bread Flour 🌾 | 1 ½ cups | For extra chewiness |
| Granulated Sugar 🍚 | ½ tsp | Enhances fermentation |
| Kosher Salt 🧂 | 1 ½ tsp | Diamond Crystal preferred |
| Water 💧 | 1 ½ cups | Lukewarm, not hot |
| Olive Oil 🫒 | 1 tbsp | Extra-virgin for flavor |
| Tomato Basil Soup 🍅 | 4 cups | For filling bowls |
| Parmesan Cheese 🧀 | ½ cup | Freshly grated, for topping |
| Fresh Basil Leaves 🌿 | ¼ cup | Chopped, for garnish |
| Balsamic Glaze 🍷 | 2 tbsp | Optional drizzle |
| Garlic Cloves 🧄 | 2 cloves | Minced, for soup |
| Butter 🧈 | 2 tbsp | Unsalted, for brushing |
| Cornmeal 🌽 | ¼ cup | For dusting loaf pan |
The sourdough starter is your foundation—King Arthur or a trusted homemade culture works best. If you're short on time, store-bought sourdough dough from a bakery section cuts prep time dramatically. For flour, King Arthur Bread Flour gives that perfect chew, but any high-protein blend (12-14% protein) does the trick. The water temperature matters—too hot and you kill the yeast; too cold and fermentation stalls. 60°F is ideal, but room temp water (70°F) works if you're in a hurry. I always double-check my starter's activity before mixing—it should float in water like a champ.
No sourdough starter? Instant yeast (1/4 tsp) + 1/2 cup warm water gets you close, though flavor won't be identical. Swapping bread flour for all-purpose? Add 1 tsp vital wheat gluten to mimic the structure. The olive oil can be omitted if you're watching calories, but trust me—it makes the crust shine. For the soup filling, Rao's tomato basil is my go-to jarred option, but homemade with San Marzano tomatoes and fresh basil takes it to the next level. The garlic cloves? Roast them first for a sweeter, deeper flavor that pairs perfectly with the bread's crust.
This dough needs 12-18 hours of cold proofing—set a reminder or you'll forget. Once baked, let the loaves cool completely before hollowing (at least 2 hours) or they'll crumble. Store unbaked dough in the fridge for up to 3 days or freeze for 3 months—wrap tightly in plastic. Hollowed bowls? Reheat at 350°F for 5-10 minutes before filling to keep them crisp. The filling soup reheats beautifully—double the batch and freeze portions for lazy weeknights.
Why You'll Love This Recipe
- No-Knead Magic: I swear by this dough—just mix, shape, and let it rise while you handle the rest of dinner. The bread flour gives it that perfect chewy bite, and honestly? I’ve made it while scrolling through my phone.
- Tangy, Toasty Crust: That sourdough starter isn’t just for show—it delivers a deep, funky flavor that pairs insanely well with savory fillings. The sugar in the dough caramelizes into a crispy, golden crust that’s impossible to resist.
- Game for Any Meal: Stuff it with chili for a hearty dinner, turn it into a dessert bowl with ice cream, or use it to serve soup when company drops by. It’s my go-to for potlucks, lazy Sundays, or when I need to impress without stressing.
- Leftovers? Never Wasted: Bake one big bowl, slice it up, and reheat portions in the oven until golden—no sad, dry bread here. Between us, I’ve also used stale slices as croutons or breadcrumbs for meatballs. Zero waste, all flavor.
Step-by-step instructions for artisan sourdough bread bowls
Transform your sourdough into edible bowls that hold soup perfectly—crispy outside, tender inside.
Prepare the Sourdough Dough
In a large mixing bowl, combine the 1 cup active sourdough starter, 3.5 cups all-purpose flour, 1.5 cups bread flour, 0.5 tsp granulated sugar, and 1.5 tsp kosher salt. Mix until just combined, then gradually add the 1.5 cups lukewarm water and 1 tbsp olive oil, stirring until a shaggy dough forms.
Turn the dough onto a lightly floured surface and knead for 8-10 minutes until smooth and elastic. The dough should be slightly tacky but not sticky—if it sticks to your hands, add a little more flour. Shape it into a round loaf, place it in a lightly oiled bowl, cover with a damp towel, and let it rise at room temperature for 1-2 hours or until doubled in size.
Shape and Hollow the Loaves
Preheat your oven to 375°F and line a baking sheet with parchment paper. Once the dough has risen, gently deflate it and divide it into 4 equal portions. Shape each portion into a 12-inch round loaf, about 2 inches thick, and place them on the prepared baking sheet.
Using a sharp serrated knife, carefully hollow out the centers of the loaves, creating a deep well that can hold 1 cup of soup. Be precise—you want thick enough walls to hold their shape but a wide enough opening for easy serving. Brush the outsides with melted 2 tbsp butter for extra crispiness.
Bake Until Golden and Crisp
Bake the hollowed loaves for 30-35 minutes until the crust is deep golden brown and the internal temperature reaches 205°F. The edges should be crisp, while the walls should remain soft enough to hold their shape. Rotate the pans halfway through baking for even browning.
Remove the loaves from the oven and let them cool on a wire rack for 15 minutes. While they cool, prepare the 4 cups tomato basil soup by sautéing the 2 minced garlic cloves in a pot until fragrant, then adding the soup and simmering for 10 minutes. Season with salt and pepper to taste.
Assemble and Serve the Bread Bowls
Once the loaves are cool enough to handle, carefully fill each hollowed loaf with 1 cup of the tomato basil soup. Sprinkle the tops generously with 0.5 cup freshly grated Parmesan cheese and 0.25 cup chopped fresh basil leaves. Drizzle lightly with 2 tbsp balsamic glaze for a touch of sweetness.
Serve immediately while the bread is still warm and crisp. The contrast of the crispy, toasted exterior with the creamy, warm soup inside makes every bite unforgettable. For extra flair, dust the baking sheet with 0.25 cup cornmeal before shaping the loaves—it adds texture and prevents sticking.
Pro Tips For Making Artisan Sourdough Bread Bowl
- STRETCH THE DOUGH: Use a bench scraper to fold the dough every 30 minutes for 2 hours—this builds strength without overworking it. I learned this the hard way when my first attempt turned gummy; the scraper gives you leverage while keeping your hands out of the sticky mess.
- WEIGH YOUR FLOUR: Skip the scooping—use a kitchen scale for both all-purpose and bread flour. The recipe’s hydration balance depends on precise measurements, and volume scooping adds too much guesswork. (Yes, even if you’re impatient like me.)
- HOLLOW THE BOWL LATE: Wait until the dough has proofed almost fully before carving out the center—about 70% of its final rise. I used to do it too early, and the walls collapsed when baking. A paring knife works best; angle it to avoid tearing the structure.
- STEAM THE FIRST 10 MINUTES: Place a metal bowl of boiling water on the oven rack before baking—this creates steam for a crisp crust. After 10 minutes, remove it and crank the heat to 425°F (220°C). Sounds weird, but it works: my first attempt without this had a sad, dense crust.
Perfect pairings for this dish
Soup Pairings
Your artisan sourdough bread bowl shines brightest with creamy, flavorful soups that soak into the bread without turning it soggy. Tomato basil soup is my go-to—its acidity balances the bread's richness while the basil leaves add freshness.
For a heartier option, try cream-based soups like butternut squash or roasted red pepper, which pair beautifully with the bread's crusty texture. 🍲
Cheesy Dip Fillings
Skip the soup and transform your bread bowl into a cheesy dip vessel for ultimate shareability. Load it with warm spinach-artichoke dip, buffalo chicken dip, or garlic-parmesan dip.
The bread's sturdy walls hold the fillings perfectly while absorbing the melted cheese flavors. For extra indulgence, top with crumbled bacon or pickled jalapeños before serving.
Chili and Stew Options
For a hearty, protein-packed filling, nothing beats beef chili or white chicken chili in a sourdough bowl. The bread's crust stays crisp while the walls soften just enough to soak up the juices.
I love adding shredded cheddar and sour cream on top for a comforting, restaurant-style experience. A sprinkle of fresh cilantro or green onions adds a pop of color and freshness.
Dessert Twists
Why stop at savory? Turn your bread bowl into a dessert centerpiece with warm chocolate lava cake, bread pudding, or cinnamon-spiced apple compote.
The bread's texture contrasts perfectly with creamy fillings, while a drizzle of caramel sauce or vanilla ice cream on top takes it to next-level decadence. For a lighter option, fill with lemon curd and top with berries for a refreshing treat.
Beverage Pairings
Pair your bread bowl creations with crisp white wines like Sauvignon Blanc or Pinot Grigio to complement the bread's crust and creamy fillings. For a non-alcoholic option, sparkling water with lemon or iced hibiscus tea refreshes the palate between bites.
If serving chili or spicy dips, a light lager or ginger ale helps balance the heat.
Make-Ahead Tips
Prep your bread bowls ahead of time for easy entertaining. Bake the hollowed loaves 1-2 days in advance, store them in an airtight container at room temperature, and reheat at 350°F for 5-10 minutes before filling.
For soups or dips, make them fresh or reheat gently to maintain texture. The bread's crust stays crispy even after reheating, making it perfect for last-minute gatherings. ✨
Nutrition facts
Frequently asked questions
Can I use store-bought sourdough dough instead of making my own?
Store-bought sourdough dough works perfectly—just shape it into a 2-inch-thick round and hollow it before baking. For best results, choose a dough with high hydration (70-75%) and let it rest at room temperature for 30 minutes before shaping to make hollowing easier.
How do I prevent the bread bowl from breaking when hollowing?
Let the loaves cool completely (2+ hours) before hollowing—they’ll be more stable. Use a sharp serrated knife and cut slowly in small increments, leaving walls at least ½-inch thick. For extra support, brush the inside with egg wash before baking.
What's the best way to reheat filled bread bowls?
Reheat empty bowls at 350°F for 5-10 minutes to restore crispiness. For filled bowls, cover with foil and warm at 325°F for 8-10 minutes—this keeps the bread from getting soggy while heating the filling. Add garnishes (like cheese or herbs) after reheating to keep them fresh.
Can I make gluten-free sourdough bread bowls?
Yes, but texture will differ. Use a 1:1 gluten-free flour blend with xanthan gum and increase hydration slightly. The dough will be stickier, so shape carefully and hollow with extra caution. Expect a denser crumb—pair with thicker fillings like chili or cheese dips for best results.
How long can I store hollowed bread bowls before filling?
Store in an airtight container at room temperature for up to 3 days or freeze for 1 month. Reheat before filling to maintain crispiness. For maximum freshness, hollow and fill the same day—this ensures the bread stays sturdy and flavorful.