
Side Dishes
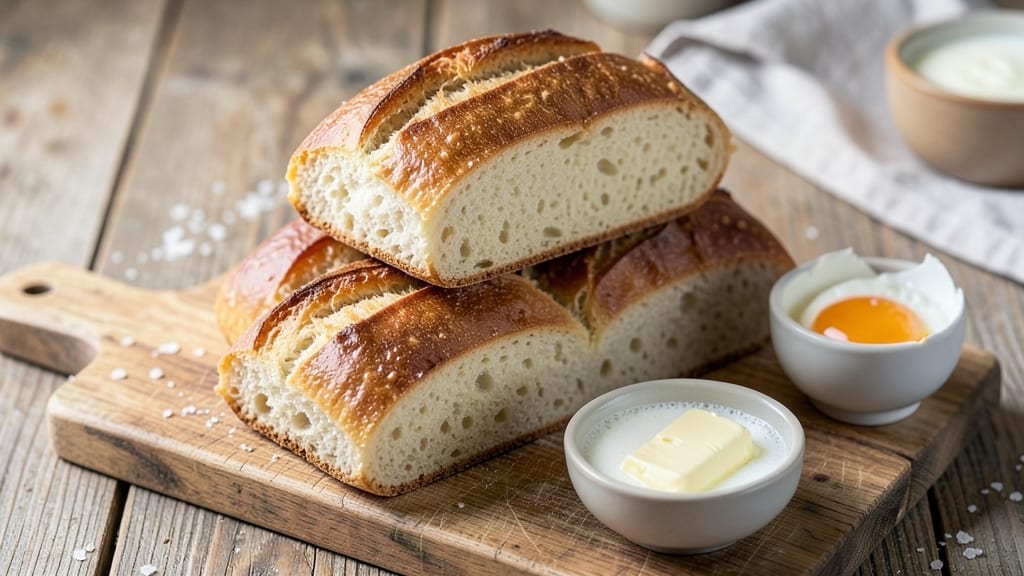
This at-home sandwich bread recipe delivers the perfect balance of pillowy softness and a crusty bite—just like your favorite bakery loaf. 💛 The secret lies in precise dough development and gentle shaping, which creates an open crumb structure ideal for sandwiches without drying out.
I've tested countless variations to perfect the texture: tender enough to hold fillings without tearing, yet sturdy enough to support hearty ingredients.
What makes this recipe stand out is the foolproof method that works for beginners—no fancy equipment required. You'll work with simple ingredients like bread flour, yeast, and sugar, but the technique transforms them into a loaf with restaurant-quality texture.
The dough rests twice (once cold, once warm) to develop flavor and gluten, ensuring slices that stay soft for days when stored properly.
By the time you pull that golden-brown loaf from the oven, you'll have perfectly even slices with a crisp crust and airy interior—no dense, heavy bread here. The aroma alone will have everyone gathering around the kitchen, and the first bite will prove why homemade is always better.
This recipe builds confidence in your baking skills while delivering results that rival artisanal bread.
The best part? This loaf stays fresh for 5-7 days when wrapped properly, making it perfect for meal prep. Whether you're making grilled cheese, turkey sandwiches, or simply toast, this bread will elevate every bite. Let's get started on creating your perfect sandwich loaf.
Ingredients for at home sandwich bread
Simple staples transform into bakery-style loaves with perfect sandwich texture.
| Ingredient | Amount | Notes |
|---|---|---|
| Bread Flour 🌾 | 4 cups | High protein for structure |
| Active Dry Yeast 🍞 | 2 ¼ tsp | Or 1 packet (7g) |
| Granulated Sugar 🍚 | 1 ½ tbsp | Feeds yeast for rise |
| Unsalted Butter 🧈 | ½ cup | Cold, cubed for flavor |
| Whole Milk 🥛 | ½ cup | Warmed to 100°F |
| Large Eggs 🥚 | 1 whole | Room temperature |
| Salt 🧂 | 1 ½ tsp | Diamond Crystal preferred |
| Water 💧 | ½ cup | Room temperature |
| Cornmeal 🌽 | ¼ cup | For dusting baking sheet |
| Coarse Sea Salt 🧂 | 1 tbsp | For sprinkling crust |
| Sesame Seeds 🌱 | 1 tbsp | Optional for topping |
The bread flour is non-negotiable here—King Arthur or Bob's Red Mill are my go-tos for that ideal protein level. Active dry yeast needs to be fresh (check the date—it expires!), and King Arthur sells it in small jars perfect for this recipe. The butter should be cold but not rock-hard—press a cube with your finger to test. For the milk, warm it just enough to melt the butter cubes without cooking. Room-temperature egg and water are key for smooth dough. Pro tip: measure flour by scooping and leveling, not packing it down.
No bread flour? All-purpose plus 1 tbsp vital wheat gluten mimics the structure. Out of yeast? Instant yeast works 1:1, but don't skip the warm milk—it activates the yeast faster. Butter substitute? Vegetable shortening or coconut oil (solid) keeps that tender crumb. For the milk, powdered milk mixed with water works in a pinch, but it won't be quite as rich. Sesame seeds optional, but they add that bakery-loaf crunch—Trader Joe's sells them in bulk for cheap. The coarse salt on top? Maldon flakes if you're fancy, but any flaky sea salt does the trick.
Dough keeps for 24 hours in the fridge wrapped tightly, or 3 months frozen in a sealed bag. Fresh-baked loaves stay soft for 5-7 days when wrapped in a clean kitchen towel inside a plastic bag. For meal prep, slice and freeze portions—toast straight from frozen for crispy results. The crust gets crunchier as it sits, so slice just before serving for that bakery-fresh bite.
Why You'll Love This Recipe
- No-Fuss Dough: I swear by this mix—just bread flour, yeast, sugar, butter, and milk. No kneading machines, no fancy ratios, just a bowl and a little elbow grease (or even a stand mixer if you’re feeling lazy). The butter and milk make it tender without being greasy, and the yeast does all the heavy lifting while I sip my coffee.
- Crusty-Creamy Magic: That golden crust? Achievable. The soft, pillowy interior? Guaranteed. The secret’s in the butter—just enough to keep it rich but not heavy, and the sugar gives it a subtle sweetness that makes every slice sing. Honestly, it’s the kind of bread that disappears faster than my willpower on a Sunday morning.
- Weeknight Workhorse: This is my go-to for lunchboxes, charcuterie boards, or just slathering it with jam when I’m tired. It freezes like a dream (toast straight from frozen, no joke), and a single batch feeds my family for days. Between us, I’ve made it for book club nights, sick-day toast, and even as a makeshift pizza base—it’s that reliable.
- Budget-Friendly Staple: A loaf costs me pennies compared to store-bought, and the ingredients last forever. The yeast is cheap, the flour is versatile, and the butter stretches further than you’d think. I’ll be real: I’ve even split a batch with a neighbor because it’s just that good—and that practical. No guilt, all satisfaction.
Step-by-step instructions for pillowy soft sandwich bread
Here's how to bake restaurant-quality bread at home with a soft interior and crisp crust.
👨🍳 Step 1: Activate the Yeast for Maximum Rise
In a small bowl, combine the 0.5 cup warm water (about 100°F—warm to the touch but not hot), 1.5 tbsp granulated sugar, and 2.25 tsp active dry yeast. Let it sit for 5-10 minutes until frothy. You'll see bubbles forming and the mixture expanding—that's your yeast waking up and getting ready to work its magic.
If it doesn't foam within 10 minutes, your yeast might be dead. Start over with fresh yeast—this is the foundation of your bread's rise. Once active, you're ready to build the dough. I always use a small bowl for this step to make it easier to see the yeast's activity.
👨🍳 Step 2: Mix the Dough and Knead Until Silky
In the bowl of a stand mixer fitted with the dough hook attachment, combine the 4 cups bread flour, 1.5 tsp salt, and the yeast mixture. Mix on low speed for 1 minute until combined. Then add the 0.5 cup cold cubed butter, 0.5 cup whole milk, and 1 whole large egg.
Increase the speed to medium and knead for 5-7 minutes until the dough is smooth and elastic. It should pull away from the sides of the bowl and form a tight ball when pressed. If it's too sticky, add 1 tablespoon flour at a time until it comes together. The dough should feel like soft, smooth putty—this is when the gluten develops properly for that perfect sandwich bread texture.
🥘 Step 3: Let the Dough Rise Until Nearly Doubled
Lightly grease a large bowl with a bit of butter or oil, then place the dough inside. Cover with a damp kitchen towel and let it rise in a warm place for 1-1.5 hours or until it has nearly doubled in size. I like to place my oven light on (with the oven off) to create a warm, cozy environment for the yeast to work its magic.
You'll know it's ready when you poke the dough gently and it springs back slowly, leaving a slight indentation. This first rise is crucial—it develops the air pockets that will make your bread light and pillowy. Don't rush this step; patience here pays off with perfect texture. If your kitchen is cold, extend the rise time to 2 hours.
🔥 Step 4: Shape and Proof for That Perfect Crust
Punch down the risen dough to release the air, then turn it out onto a lightly floured surface. Divide it into 4 equal portions (about 1 pound each) and shape each into a smooth, round loaf. Place them seam-side up in a greased 9x5-inch loaf pan, covering each with a damp towel. Let them proof for 30-45 minutes until they've risen about 1 inch above the pan.
While they're proofing, preheat your oven to 375°F. Sprinkle the 0.25 cup cornmeal evenly over the bottom of the loaf pan—this creates a crispy, golden crust on the bottom of your bread. When the dough has risen, sprinkle the 1 tbsp coarse sea salt and 1 tbsp sesame seeds (if using) evenly over the tops of the loaves for that classic bakery look.
🔥 Step 5: Bake to Golden Perfection with Crispy Crust
Bake the loaves for 25-30 minutes until they're golden brown and sound hollow when tapped on the bottom. The internal temperature should reach 190-200°F. For that perfect crust, I like to spray the oven walls with water during the last 5 minutes of baking—this creates steam that makes the crust extra crispy and the interior extra soft.
Remove the bread from the oven and let it cool in the pan for 10 minutes, then transfer to a wire rack. This resting period is crucial—it allows the bread to set properly so it doesn't turn gummy when sliced. Once cooled, slice with a sharp serrated knife for that perfect sandwich bread texture: soft, pillowy slices with a satisfying crusty bite.
Pro Tips For Making At Home Sandwich Bread
- Warm the Milk First: Pour your whole milk into a microwave-safe mug and heat it to 105–110°F—just until it steams but doesn’t bubble. Cold milk kills yeast faster than you’d think, and lukewarm is the sweet spot for activation. (Yes, even if you’re impatient like me, resist the urge to skip this.)
- Knead Until Glassy: Your dough should feel smooth, elastic, and slightly tacky—like a windowpane when stretched thin. If it tears or feels dry, add 1 tablespoon milk at a time. Over-kneading? Not here—this bread thrives on a firm, cohesive texture. (I learned this the hard way after a gummy loaf that collapsed like a soufflé.)
- Skip the Crowding: Let your dough rise in a lightly greased bowl—not touching the sides. Crowding traps moisture and slows fermentation, leading to dense bread. If it rises to the rim, just poke it down once. (Your future self will thank you when you slice into a perfectly airy loaf.)
- Butter Matters More: Use room-temperature unsalted butter (65–70°F) and cut it into the dough in small cubes—this distributes fat evenly for that classic sandwich bread tenderness. Cold butter pockets = tough bread. (I was skeptical until I tried it—now I never go back.)
Best sauces and condiments for at home sandwich bread
Classic Butter Spread
Nothing elevates sandwich bread like a simple butter spread—I mean, it’s the ultimate classic for a reason. For a rich, flavorful twist, mix ½ cup softened unsalted butter with 1 tbsp honey and a pinch of flaky sea salt.
Warm the butter slightly to blend, then spread generously on toasted slices. This combo adds a touch of sweetness that pairs perfectly with savory fillings like ham or turkey. 🧈
Garlic-Herb Compote
For a savory, aromatic spread, create a garlic-herb compote that’s perfect for grilled cheese or open-faced sandwiches. Sauté 4 minced garlic cloves in 2 tbsp olive oil until golden, then add 2 tbsp fresh parsley, 1 tbsp fresh thyme, and 1 tbsp lemon juice.
Let it cool before spreading—this adds a bright, herby kick that cuts through rich cheeses like brie or gouda.
Spicy Honey Mustard
Sweet, tangy, and a little spicy—this honey mustard is a game-changer for sandwiches. Mix ¼ cup Dijon mustard, 2 tbsp honey, 1 tbsp apple cider vinegar, and ½ tsp cayenne pepper.
Thin with 1 tbsp water if needed, then spread on your bread before adding fillings. It’s especially delicious with roasted chicken or crispy bacon.
Avocado Lime Cream
For a creamy, fresh option, blend 1 ripe avocado, 2 tbsp sour cream, 1 tbsp lime juice, ½ tsp salt, and 1 tbsp chopped cilantro until smooth.
This spread adds a bright, zesty contrast to hearty sandwiches like pulled pork or steak. Serve immediately to prevent browning—it’s worth the effort for that restaurant-quality texture. 🥑
Pesto Variations
Swap traditional pesto for creative twists that still shine with your sandwich bread. Try sun-dried tomato pesto (add 2 tbsp sun-dried tomatoes to classic basil pesto) or spicy arbol pesto (mix 1 tbsp arbol chili powder into your pesto).
Spread on toasted bread before adding proteins like grilled shrimp or prosciutto for a bold, herby flavor.
Sweet Jam or Fruit Spreads
Don’t underestimate the power of a good jam—it’s a crowd-pleaser for breakfast sandwiches or sweet lunches. My go-to is strawberry jam with a smear of cream cheese for a sweet-savory balance.
For something lighter, try fig spread or apricot jam**—both add a luxurious touch to plain bread. Pair with ricotta or goat cheese for extra richness.
Nutrition facts
Frequently asked questions
Can I use all-purpose flour instead of bread flour?
The recipe calls for bread flour because it has a higher protein content (12-14%) that creates the perfect sandwich bread texture—light, airy, and sturdy. If you must substitute, mix 4 cups all-purpose flour with 1 tablespoon vital wheat gluten to mimic the protein level. Without it, your loaf may be denser or crumble more easily when sliced.
Why does my dough keep sticking to my hands?
Sticky dough is normal during the first rise, but you can fix it! Wet hands make it worse—always wet your hands with water, not oil, when handling dough. If it's too sticky, add 1 tablespoon flour at a time while kneading until it becomes smooth and elastic. The dough should feel like soft, smooth putty that pulls away from your fingers. Over-kneading can also make it sticky, so aim for 5-7 minutes total kneading time.
How do I know when the bread is fully baked?
Your bread is done when it reaches an internal temperature of 190-200°F and has a golden-brown crust. Tap the bottom—it should sound hollow like a drum. Another trick: pull the bread from the pan and check the bottom for even browning. If it's pale, return it to the oven for 5 more minutes. Overbaking dries out the bread, so don't rely on color alone—always use a thermometer for accuracy.
Can I make this bread without a stand mixer?
Use a large mixing bowl and your hands to knead the dough. After combining all ingredients, turn the dough onto a lightly floured surface and knead for 8-10 minutes, pushing and folding it until smooth and elastic. The extra time compensates for the lack of mixer power—just be patient! For best results, use a dough scraper to help turn and fold the dough during kneading.
Why did my bread turn out dense instead of soft?
Dense bread usually means one of three things: underproofed dough (not enough rise time), over-kneading (breaking down gluten), or using too much flour during shaping. Make sure your dough rises until it nearly doubles in size (about 1-1.5 hours in a warm place) and that you're not adding extra flour unless absolutely necessary. Also, check your yeast—if it's old or inactive, it won't create enough gas for a light texture.