
Side Dishes
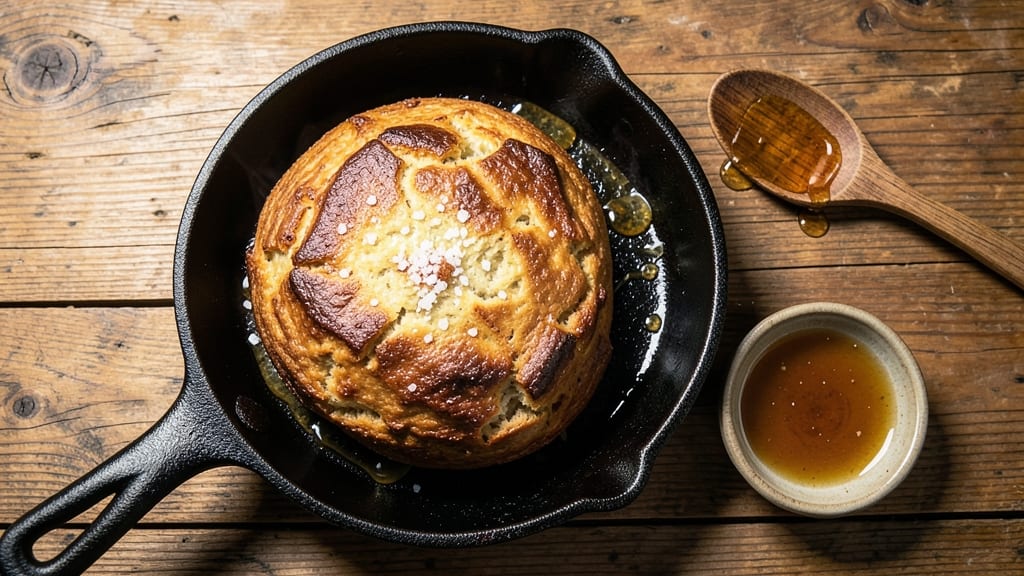
This Australian damper bread recipe delivers the rustic charm of bushland cooking with its signature crispy crust and soft, pillowy center. Born from outback tradition, damper was originally baked in campfire ashes or on hot coals, giving it that unmistakable smoky character.
What makes it special is its simplicity—just four ingredients transform into a bread so iconic, it’s considered Australia’s answer to sourdough.
The magic happens when flour, baking powder, butter, and milk combine into a dough that bakes until the crust turns golden and crackly, while the inside stays tender. No yeast or fancy techniques required—just a hot oven or campfire.
This recipe stays true to its roots while offering flexibility for modern twists like honey-glazed or herb-infused variations.
By the time you pull it from the oven, you’ll have a bread that’s crisp enough to hold jam or butter without crumbling, yet soft enough to tear with your hands.
The aroma alone will transport you to an Australian bush campfire, where damper was the heart of every meal. Perfect for picnics, breakfast, or as a side to roasted meats.
Whether you’re baking it in a cast-iron skillet over a fire or in your home oven, the result is the same: a bread that’s equal parts comforting and nostalgic. Let’s get started on this timeless Australian classic.
Ingredients for australian damper bread
Four simple ingredients create Australia's iconic bushfire bread with crispy crust and tender heart.
| Ingredient | Amount | Notes |
|---|---|---|
| All-Purpose Flour 🌾 | 3 cups | Sifted for best texture |
| Baking Powder 🍞 | 2 tsp | Ensures light, airy rise |
| Unsalted Butter 🧈 | ½ cup | Cold, cubed for even baking |
| Whole Milk 🥛 | ¾ cup | Room temperature preferred |
| Salt 🧂 | ½ tsp | Kosher or sea salt |
| Honey 🍯 | 1 tbsp | Optional for glaze (optional) |
| Fresh Rosemary 🌿 | 1 tbsp | Chopped, optional herb |
The flour is the foundation—King Arthur or White Lily are my go-tos for that perfect rustic texture. Bulk bins at Whole Foods often have the best quality, but any all-purpose will work. The butter should be cold; cut it into small cubes to ensure even baking. If you're feeling adventurous, swap the rosemary for thyme or oregano—just keep the amount the same. And if you're baking over a campfire, use a cast-iron skillet for that authentic smoky flavor.
No baking powder? Self-rising flour plus 1/4 tsp salt works in a pinch. Short on butter? Coconut oil or lard (yes, lard!) gives similar results. Milk too thin? Add 1 tbsp extra flour—this dough should hold together but not be sticky. The honey glaze is optional, but if you add it, use raw Manuka honey for that extra outback touch. And if you're making this ahead, the dough keeps in the fridge for 24 hours—just let it sit at room temp before shaping.
This bread reheats beautifully—wrap it in foil and warm in the oven for 5-10 minutes to revive that campfire aroma. Store leftovers in a bread bag at room temp for 3 days, or freeze for 3 months by wrapping tightly in plastic. The crust gets even crunchier the next day, so make extra if you can. And if you're baking over a fire, let it cool completely before wrapping to prevent condensation.
Why You'll Love This Recipe
- No-Fuss Pantry Staples: I swear, this bread only needs five things—flour, butter, milk, salt, and baking powder. Honestly, if you’ve got a cupboard, you’ve got damper. The butter-milk mix alone makes it taste like a campfire treat without the fuss of measuring out eggs or yeast.
- Golden Crust Magic: That crispy, golden crust with a soft inside? It’s all in the baking powder and a hot pan. I’ll be real: my first attempt was lopsided, but now I know—just press it down gently and let the heat work its charm. The flavor? Ridiculously good, like a cross between sourdough and a warm hug.
- Campfire to Coffee Table: Between us, this is my go-to for bush walks, last-minute guests, or lazy Sundays. Toast it with jam for breakfast, serve it with butter and honey for a snack, or even use it to mop up stew. It’s the one bread that never lets me down—no matter the occasion.
- Budget-Friendly Leftovers: A single batch feeds four, and the leftovers? They last days in the fridge. My kids fight over the slices, and I’m always saving scraps for French toast the next morning. Plus, the ingredients cost pennies—this is the kind of recipe that makes me feel like I’m winning at cooking.
Step-by-step instructions for Australian damper bread
This rustic bread delivers that iconic campfire crust with a soft, hearty center—no fancy equipment needed.
Mix Dry Ingredients for Perfect Texture
In a large bowl, whisk together the 3 cups all-purpose flour and 2 teaspoons baking powder until evenly combined. I like to use a whisk for this step to avoid developing too much gluten—we want a tender crumb, not a tough one. Add the 0.5 teaspoon salt and mix again to distribute evenly.
Next, cut the 0.5 cup cold, cubed unsalted butter into the flour mixture using a pastry cutter or your fingers. Work quickly to keep the butter cold—this prevents the dough from becoming too soft and sticky. You're aiming for pea-sized butter pieces throughout the flour. If you're using the optional 1 tablespoon chopped fresh rosemary, sprinkle it in now and mix lightly.
Combine Wet Ingredients for Smooth Dough
Create a well in the center of your dry ingredients and pour in the 0.75 cup room-temperature whole milk. Using a wooden spoon or your hands, gently mix until just combined. You'll notice the dough will be shaggy at first—that's normal. Add the 1 tablespoon honey and mix again until fully incorporated.
Here's where it gets interesting: the dough should be soft but not sticky. If it's too dry, add 1 teaspoon more milk at a time until it comes together when pressed. If it's too sticky, sprinkle in 1 tablespoon more flour until it holds its shape. Remember, this is rustic bread—imperfections are part of the charm, but we want it workable.
Shape and Prepare for Baking
Turn the dough onto a lightly floured surface and gently shape it into a round loaf about 3 inches thick. Don't worry about perfect symmetry—damper is meant to be rustic. Place it on a parchment-lined baking sheet and cover loosely with plastic wrap. Let it rest at room temperature for 30 minutes while you preheat your oven to 425°F.
This resting period allows the gluten to relax slightly, which helps prevent cracking during baking. While waiting, I like to position my oven rack in the middle position—this ensures even heat distribution for that perfect crust all around.
Bake Until Golden and Crisp
Carefully transfer the dough to the preheated oven and bake for 20-25 minutes. You'll know it's ready when the top is deep golden brown with a crisp crust that sounds hollow when tapped. The internal temperature should reach 190-195°F when checked with an instant-read thermometer.
Here's the traditional touch: in the last 5 minutes of baking, increase the oven temperature to 450°F for a few minutes. This creates that beautiful bushfire-toasted crust while keeping the interior soft and pillowy. If you're not using rosemary, now's the time to brush the top with a little more honey mixed with water for extra shine.
Cool and Serve Warm
Remove the damper from the oven and let it cool on a wire rack for 10 minutes. This resting period is crucial—it allows the steam inside to redistribute, preventing a gummy texture. While cooling, you'll notice that beautiful contrast between the crisp exterior and soft interior that makes damper so special.
Slice with a sharp serrated knife and serve warm, either plain or with butter. The crust should be firm enough to hold its shape when sliced, while the interior remains tender. Store any leftovers wrapped in a clean kitchen towel to keep it fresh—this bread tastes even better the next day when slightly stale.
Pro Tips For Making Australian Damper Bread
- MEASURE MILK COLD: I learned this the hard way—warm milk makes the butter melt too fast during mixing, turning your dough into a greasy mess. Use milk straight from the fridge, and your damper will hold together like it should.
- PACK THE PAN TIGHT: Damper needs to steam, not spread. Press the dough into the pan until it’s at least 3cm thick—no gaps, no uneven spots. I used to skimp, and my bread always ended up flat and dense.
- SALT THE BUTTER: Skip salting the milk and add all the salt to the butter instead. This guarantees even flavor without risking over-salting if you forget later. (Yes, I’ve over-salted damper before—don’t ask.)
- TEST WITH A KNIFE: The "tap the top" trick doesn’t work here. Stab the center with a knife—if it comes out clean, it’s done. If not, give it another 5 minutes. I used to pull it too soon, and the middle stayed doughy.
Essential equipment for this recipe
Cast-Iron Skillet
This is my go-to tool for authentic damper—nothing beats the smoky, crispy crust you get from baking over a campfire. A 10-inch Lodge cast iron skillet is perfect for this recipe, both in your oven and over open flames.
Preheat it in the oven for 10 minutes at 425°F before adding the dough to ensure even cooking. The skillet retains heat beautifully, giving you that signature bushfire crust even in your home kitchen. 🔥
Mixing Bowl
A large stainless steel mixing bowl (I use a 8-quart Cambro) is ideal for combining ingredients without developing excess gluten. The smooth surface makes mixing the butter into the flour easier, and the size gives you room to work without spills.
For outdoor cooking, a heavy-duty plastic bowl works too—just avoid metal if you're baking directly over flames to prevent heat transfer.
Pastry Cutter
While fingers work in a pinch, a pastry cutter (like the OXO Good Grips model) makes cutting cold butter into flour effortlessly. This tool ensures even distribution of fat, which is key for that tender crumb.
If you don’t have one, two forks or your fingers will do—just work quickly to keep the butter cold. The goal is pea-sized pieces, not large clumps.
Parchment Paper
Lining your baking sheet with parchment paper prevents sticking and makes transferring the hot damper easier. I prefer half-sheets for this recipe—they’re sturdy enough to handle the weight and heat.
For campfire baking, skip the parchment and place the dough directly on the skillet’s surface, then cover with aluminum foil during the final minutes to trap steam.
Instant-Read Thermometer
A Thermapen One is my secret weapon for perfect damper—it ensures the internal temperature hits 190-195°F for that ideal contrast between crisp crust and soft interior. Insert the probe into the center of the loaf when the top looks golden.
Without one, tap the bottom: it should sound hollow when done. This tool is especially useful for outdoor cooking where oven gauges aren’t available. 🌡️
Wooden Spoon
A hickory or maple wooden spoon (I love the Ozeri Touch brand) is perfect for mixing the wet ingredients without adding extra fat. Wood won’t react with acidic components like metal might, and it’s gentle on the dough.
For campfire cooking, a sturdy wooden spoon is also safer to handle near open flames than plastic or metal utensils.
Nutrition facts
Frequently asked questions about Australian damper bread
Can I make damper without butter?
Yes! For a lighter version, replace the butter with 0.5 cup melted coconut oil or 0.5 cup lard (traditional bush cooking method). The texture will be slightly denser but still delicious. If using oil, chill the dough for 15 minutes before shaping to help it hold together. For extra richness, try 1 tbsp ghee instead.
How do I make damper over a campfire?
Use a 10-inch cast-iron skillet preheated on hot coals for 10 minutes. Shape the dough into a round, place it in the skillet, then cover with aluminum foil. Cook for 20-25 minutes, removing the foil for the last 5 minutes to crisp the crust. For extra smokiness, place the skillet directly on the coals for the final minutes.
Why did my damper turn out dense instead of crispy?
Overmixing the dough or using too much milk can make it dense. Keep mixing to a minimum (just until combined) and ensure your butter is cold. For extra crispiness, bake at 450°F for the last 5 minutes of baking. Also, check your baking powder is fresh—old baking powder loses its lift. A toothpick inserted in the center should come out clean when done.
Can I add other flavors besides rosemary?
Try 1 tbsp dried thyme, 1 tsp garlic powder, or 1/4 cup grated Parmesan for a savory twist. For sweet variations, add 1/2 cup chopped dates or 1 tsp cinnamon. Just be mindful of moisture—if adding wet ingredients like fruit, reduce the milk by 1-2 tbsp to maintain the right dough consistency.
How long can I store homemade damper?
At room temperature, wrap it in a clean kitchen towel and store in a bread bag for 3 days. For longer storage, freeze the whole loaf (unwrapped) for 3 months350°F oven for 5-10 minutes covered with foil. The crust gets even crunchier after the first day, so make extra if you can!