
Desserts
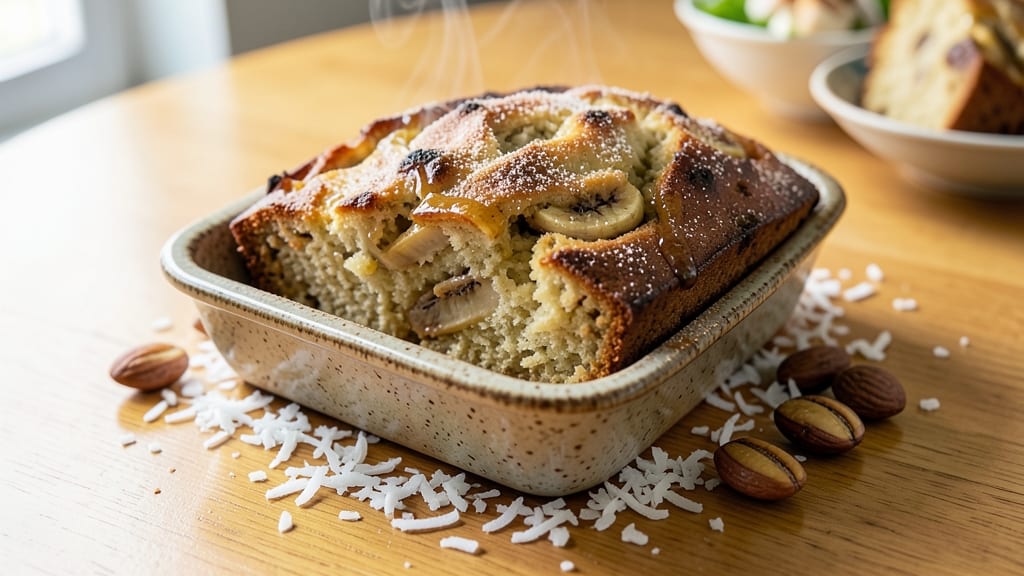
This authentic Hawaiian banana bread brings the islands' warm spices and tropical flavors right to your kitchen. 🌺 The secret lies in macadamia nuts, toasted coconut, and a hint of pineapple—ingredients that transform ordinary banana bread into a moist, fragrant masterpiece with every bite.
I've perfected this recipe over years of baking, ensuring it stays tender and never dry, even days later.
The magic starts with ripe bananas mashed into the batter, their natural sweetness balanced by warm spices like cinnamon and nutmeg. A swirl of coconut cream and macadamia nuts adds texture and richness, while pineapple juice keeps the crumb light.
Unlike traditional recipes, this version incorporates authentic Hawaiian flavors without sacrificing simplicity—no fancy equipment, just a standard loaf pan and 60 minutes of oven time.
What you'll end up with is a loaf that's perfectly moist, with a golden crust and pockets of nutty, tropical swirls throughout. The aroma alone will have everyone gathering around the kitchen, and the first slice reveals layers of flavor—sweet, spiced, and just slightly tangy from the pineapple.
It's the kind of bread that disappears faster than you can say "aloha."
Serve warm with a pat of butter or dusted with powdered sugar for an extra touch of island charm. The leftovers? Even better the next day, making this the ultimate dessert for sharing—or keeping all to yourself. Let's bake this Hawaiian classic.
Ingredients for authentic hawaiian banana bread
Ripe bananas, warm spices, and tropical swirls—this loaf delivers island flavors without the fuss.
| Ingredient | Amount | Notes |
|---|---|---|
| Ripe Bananas 🍌 | 3 medium | Mashed, about 1.5 cups total |
| All-Purpose Flour 🌾 | 2 cups | Sifted for light texture |
| Granulated Sugar 🍚 | 1 cup | White or light brown |
| Packed Brown Sugar 🍚 | ½ cup | For moisture and caramel notes |
| Unsalted Butter 🧈 | ¾ cup | Room temperature, full-fat |
| Large Eggs 🥚 | 2 whole | Room temperature for even mixing |
| Pure Vanilla Extract 🌿 | 1 tbsp | High-quality for authentic flavor |
| Ground Cinnamon 🌶️ | 2 tsp | Freshly ground preferred |
| Ground Nutmeg 🌿 | ½ tsp | Freshly grated for depth |
| Toasted Unsweetened Coconut Flakes 🥥 | ½ cup | For tropical texture swirl |
| Chopped Macadamia Nuts 🌰 | ½ cup | Toasted lightly for richness |
| Pineapple Juice 🍍 | ¼ cup | Fresh for tangy brightness |
| Baking Soda 🧂 | ½ tsp | For tender crumb |
| Salt 🧂 | ½ tsp | Fine sea salt preferred |
| Powdered Sugar 🍚 | ¼ cup | For dusting finished loaf |
The bananas are non-negotiable—ripe with brown spots means natural sweetness and moisture. Grab 3 medium from the grocery store's produce section (they usually have them set aside). For the coconut flakes, Trader Joe's has the best toasted variety—just toast them in a dry pan for 2 minutes until golden. Macadamia nuts? Costco's bulk bin gives you the most for your money, but any store's pre-chopped works. The pineapple juice should be fresh—Dole or Maui brand are my go-tos, but any 100% pure juice works.
No ripe bananas? Use 1 cup unsweetened applesauce instead, but add 1 tsp extra vanilla. Swapping coconut? Toasted pecans or walnuts add a different crunch. Short on macadamia nuts? Cashews or almonds work in a pinch. The butter must be unsalted—salted throws off the balance. For the spices, Penzeys or bulk bins at Whole Foods have the freshest ground cinnamon and nutmeg. If you're in a hurry, pre-ground is fine, but freshly grated nutmeg makes all the difference.
This loaf keeps beautifully—3 days at room temperature wrapped in foil, or 1 week in the fridge. For longer storage, slice and freeze portions between parchment paper for up to 3 months. The powdered sugar dusting is optional but adds that final touch of island charm. I always bake an extra loaf—it disappears faster than you can say "aloha."
Why You'll Love This Recipe
- No Mash Needed: I swear by this trick—just smash those ripe bananas right in the bowl with the butter and sugars. The dough comes together smoother than any other banana bread I’ve tried, and no one ever guesses I didn’t knead it.
- Sweet But Not Cloying: The brown sugar adds depth while the ripe bananas keep it from tasting like a dessert. Honestly, it’s the kind of bread that feels like a hug—warm, comforting, but not heavy. That buttery crust? Pure satisfaction.
- Breakfast or Snack: I make a loaf on Sundays and it lasts all week—sliced for toast in the morning or packed in lunches. (Yes, even on a Tuesday night.) The texture holds up perfectly, whether you’re eating it fresh or reheated.
- Waste Not, Want Not: Between us, this recipe uses up overripe bananas that’d otherwise go bad. Plus, the ingredients are pantry staples—no fancy swaps needed. I’ve made it for potlucks, school bake sales, and lazy afternoons, and it never fails.
Step-by-step instructions for authentic Hawaiian banana bread
Here's how to create that signature tropical flavor profile with a moist crumb and perfect swirls.
👨🍳 Step 1: Prepare the Banana-Pineapple Base
In a large mixing bowl, mash the 3 medium ripe bananas until completely smooth—no lumps should remain. The bananas should measure about 1.5 cups total when mashed. Stir in the 0.25 cup pineapple juice and 1 tablespoon pure vanilla extract, mixing until fully combined. This tangy-sweet base forms the foundation of our Hawaiian flavor profile.
I like to press the bananas through a fine-mesh sieve to remove any stubborn skins or fibers—this creates that ultra-smooth texture we want. Set this mixture aside while you prepare the dry ingredients. Real talk: using overripe bananas with brown spots actually intensifies the flavor, so don't shy away from those spotted beauties!
👨🍳 Step 2: Mix Wet Ingredients and Combine
In a separate bowl, whisk together the 0.75 cup unsalted butter (at room temperature), 1 cup granulated sugar, and 0.5 cup packed brown sugar until light and fluffy—about 3-4 minutes with an electric mixer. This creaming process incorporates air that will make our bread tender. Add the 2 whole large eggs, one at a time, mixing well after each addition.
Now pour the banana-pineapple mixture into the wet ingredients and mix on low speed just until combined. Be careful not to overmix—you want to maintain that light texture. In a small bowl, whisk together the 0.5 cup toasted unsweetened coconut flakes, 0.5 cup chopped macadamia nuts, 2 teaspoons ground cinnamon, 0.5 teaspoon ground nutmeg, 0.5 teaspoon baking soda, and 0.5 teaspoon salt. This is our tropical swirl mix!
🥘 Step 3: Create the Signature Swirl Pattern
Pour about ⅓ of the batter into a greased 9x5-inch loaf pan (I use butter for that extra flavor). Sprinkle ⅓ of the coconut-nut-spice mixture evenly over the batter. Repeat this layering process—batter, then swirl mix—until you've used all the ingredients. The final layer should be batter so the swirls show beautifully when sliced.
Here's the thing—don't try to make perfectly even layers. The swirls should look rustic and natural. Use a butter knife to gently swirl the mixture in the pan, creating those signature tropical patterns. Tap the pan gently on the counter to help settle the batter and remove any air bubbles. This step makes all the difference for that authentic Hawaiian presentation!
🔥 Step 4: Bake to Golden Perfection
Preheat your oven to 350°F and place the loaf pan inside to warm for 10 minutes. This helps create an even rise. Bake for 50-60 minutes until a toothpick inserted in the center comes out clean (or with just a few moist crumbs). The bread should be golden brown on top and smell like a tropical paradise when you open the oven door.
I know it seems long, but patience pays off here. The brown sugar and coconut need time to caramelize and develop those rich flavors. If the top browns too quickly, tent the pan with foil after 30 minutes to prevent over-browning while the center finishes cooking. Let the bread cool in the pan for 15 minutes before transferring to a wire rack to cool completely.
🍽️ Step 5: Dust and Serve
Once completely cooled, dust the top generously with 0.25 cup powdered sugar using a fine-mesh sieve. This step gives that classic Hawaiian banana bread finish and balances the rich flavors. For the best texture, slice the bread while still slightly warm—this ensures clean cuts through those beautiful swirls.
Each slice should reveal those perfect tropical layers with coconut and macadamia nut swirls throughout a moist, tender crumb. The combination of warm spices, tropical fruit, and rich nuts makes this bread truly special. Store any leftovers wrapped tightly at room temperature for up to 3 days, or freeze for up to 3 months for freshness whenever you need it!
Pro Tips For Making Authentic Hawaiian Banana Bread
- Mash Bananas Like Pulp: Skip the blender—use a fork to smash the ripe bananas until they’re chunky, not smooth. That texture keeps the bread moist and adds real Hawaiian chewiness, not that sad, gluey consistency you get when overmixing.
- Brown Butter First: After melting the unsalted butter, let it brown in the pan for 3-4 minutes until it smells nutty and deep. That extra depth cuts through the sweetness of the brown sugar and bananas—trust me, it’s the difference between "good" and "wow."
- Don’t Overmix the Batter: Stir just until the flour disappears—lumpy is fine. Overmixing develops gluten and makes the bread dense instead of tender. I used to panic and mix until smooth, then wondered why my loaf turned out like a brick.
- Test for Doneness with a Toothpick: Pull the bread out when the toothpick comes out with moist crumbs, not wet batter. Hawaiian banana bread stays dense as it cools, so waiting for a clean toothpick means you’ll end up with a dry, sad loaf. Give it 5-10 minutes out of the oven to set first.
Serving suggestions for this dish
Morning Coffee Pairing
Start your day with this banana bread alongside a strong Hawaiian Kona coffee—its bold, slightly smoky notes complement the bread's sweet coconut and nutty flavors beautifully. I recommend brewing a medium-dark roast like Kona Gold or Blue Bottle's Hawaiian blend for that perfect balance.
The coffee's acidity cuts through the richness, creating a harmonious morning pairing. ☕
Afternoon Tea Elevation
Transform this into an elegant afternoon treat by serving slices with Earl Grey tea and a dollop of Hawaiian-style whipped cream. The bergamot in the tea enhances the citrus notes from the pineapple juice, while the cream adds a luxurious touch.
For extra flair, garnish with a few toasted coconut flakes and a macadamia nut half on the side. 🍵
Dessert with Ice Cream
Warm slices of this banana bread make an incredible dessert when served with vanilla bean ice cream or coconut milk ice cream. The contrast of warm bread and cool ice cream creates a decadent experience.
I like to drizzle toasted coconut syrup (just reduce coconut milk with a touch of sugar) over the top for an authentic Hawaiian touch. 🍦
Breakfast Toast Alternative
Slice this bread and toast it lightly for a sweet breakfast treat—spread with almond butter and a sprinkle of granulated sugar, or top with Greek yogurt and sliced banana.
The warm spices in the bread make it feel like a vacation breakfast any morning. For extra protein, add a side of scrambled eggs or turkey sausage. 🍳
Gift-Worthy Presentation
For special occasions, wrap the cooled loaf in parchment paper and tie it with a lemon twist and a sprig of fresh mint. Add a small jar of macadamia nut butter or a mini bottle of pineapple juice as a gift accompaniment.
The presentation makes it feel like a true taste of Hawaii—perfect for hosts or housewarming gifts. 🎁
Cocktail Pairing
Serve with a Hawaiian Mai Tai or Piña Colada for a tropical cocktail pairing that enhances the bread's flavors. The rum and pineapple in these drinks mirror the tropical notes in the banana bread, creating a cohesive experience.
For a non-alcoholic option, try virgin piña coladas or sparkling pineapple lemonade. 🍹
Nutrition facts
Frequently asked questions
Why does your recipe include pineapple juice when most banana bread recipes don't?
The pineapple juice is key to authentic Hawaiian flavor! It adds a subtle tang that balances the sweetness and mimics the tropical fruits you'd find in Hawaii. Plus, it keeps the crumb extra moist—unlike traditional banana bread that can dry out. Think of it as the secret ingredient that transports you to the islands with every bite.
Can I make this gluten-free or vegan?
For gluten-free, swap the all-purpose flour for a 1:1 gluten-free baking flour blend (like Bob's Red Mill). For vegan, replace the butter with coconut oil and use flax eggs (1 tbsp ground flaxseed + 3 tbsp water per egg). The coconut flakes and pineapple juice will still shine through while keeping it authentically tropical.
What's the best way to tell when the bread is fully baked?
Look for three signs: golden brown crust, a toothpick inserted in center comes out clean (or with just a few moist crumbs), and the edges pull away slightly from the pan. The bread should also smell like warm spices and toasted coconut. If unsure, err on the side of slightly underbaked—it'll finish cooking while cooling.
How do I prevent the bread from getting too dense?
Don't overmix the batter (just combine until ingredients are visible) and be gentle when layering the swirls. Also, make sure your butter is room temperature and your oven is fully preheated. The baking soda and proper creaming method keep it light. If it still turns out dense, your oven might run hot—try tenting with foil after 30 minutes.
Can I make this in a different pan shape?
Yes! For a round cake pan, reduce baking time by about 10-15 minutes. For a muffin tin, divide batter into 12 portions and bake at 375°F for 18-20 minutes. The swirl technique works best in rectangular pans, but you can still create mini versions. The flavor will be the same—just the presentation changes!