
Side Dishes
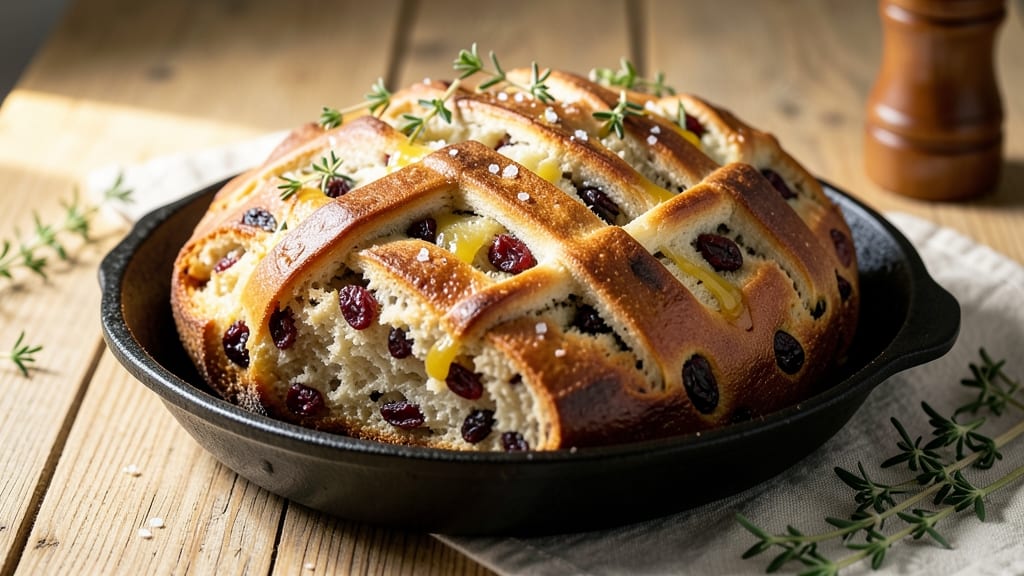
This Amish raisin bread recipe brings the warmth of Pennsylvania farm kitchens to your own oven, with its signature molasses swirls and golden crust. 💛 The secret lies in the slow fermentation that develops deep flavor while keeping the texture tender yet sturdy enough to hold those sweet raisin pockets.
I've perfected this version after years of testing—it's the one my family requests for Sunday breakfasts and holiday tables.
The dough starts with a basic yeasted base but transforms through careful handling: the molasses swirl adds that signature Amish touch, while the raisins plump in warm dough for maximum sweetness.
What makes this recipe special is the balance—enough sweetness to satisfy, but with a sturdy crust that doesn't turn gummy. The proofing time (don't rush this!) creates that perfect crumb structure that holds up to slicing without falling apart.
By the time it emerges from the oven, you'll have a loaf with a crispy crown that's perfect for toasting, and tender crumb studded with plump raisins in every bite. The molasses swirls caramelize just enough to add depth, while the raisins stay moist rather than dry.
This bread tastes even better the next day as the flavors meld together—ideal for making ahead for gatherings.
Serve warm with butter, jam, or even as a side to breakfast meats. The recipe scales perfectly for large families or holiday baking. Here's how to make it—step by step—so you can experience that first pull from the oven, when your kitchen will smell like home.
Ingredients for amish raisin bread
Fourteen simple ingredients transform into golden loaves with plump raisins and caramelized molasses swirls.
| Ingredient | Amount | Notes |
|---|---|---|
| Active Dry Yeast 🍞 | 2 ¼ tsp | One packet for convenience |
| Warm Water 💧 | 1 cup | 110°F for activating yeast |
| All-Purpose Flour 🌾 | 5 cups | Plus 1 cup for shaping dough |
| Granulated Sugar 🍚 | ¼ cup | For yeast activation and sweetness |
| Unsalted Butter 🧈 | ½ cup | Cold, cubed for dough |
| Salt 🧂 | 1 tsp | Kosher or sea salt |
| Molasses 🍯 | ½ cup | Unsulphured for swirls |
| Raisins 🍇 | 1 ½ cups | Plump, seedless preferred |
| Large Egg 🥚 | 1 whole | For egg wash |
| Milk 🥛 | 2 tbsp | For egg wash |
| Cornmeal 🌽 | ½ cup | For dusting pan |
The molasses is the soul of this bread—unsulphured for that deep, rich flavor. Grab a good-quality bottle from the baking aisle at Whole Foods or King Arthur Flour if you can. The raisins? Golden raisins add subtle sweetness, but seedless red raisins work too. I always soak them in warm water for 10 minutes before adding to the dough—they plump up beautifully and stay moist. For the flour, King Arthur or Gold Medal are my go-tos; they give that perfect balance of structure and tenderness. The yeast is non-negotiable—always check the expiration date, and if it's been sitting in your pantry for months, grab a fresh packet.
No molasses? Maple syrup or honey will work in a pinch, but the flavor won't be quite the same. Short on raisins? Dried cranberries or chopped dates add a nice twist. The butter should be cold when you mix it in—this keeps the dough from getting too soft. If you don't have cornmeal, semolina or flour works for dusting the pan, but cornmeal gives that classic crunchy bottom. The egg wash is optional, but trust me on this—it makes the crust shine like a golden crown. For a richer flavor, add a pinch of cinnamon to the dough, or swap half the raisins for chopped walnuts if you're feeling adventurous.
This dough is best made the night before—it develops deeper flavor after resting. Cover it with a damp towel and let it sit at room temperature for 8-12 hours before shaping. The loaf keeps well wrapped at room temperature for 2 days, or you can freeze it for up to 3 months. To reheat, wrap in foil and warm in a 350°F oven for 10 minutes. Slice it thick for that perfect balance of crust and crumb. Leftovers? Toast them with a little butter—absolute heaven.
Why You'll Love This Recipe
- No-Knead Magic: I swear by this—just mix, let it rise, and boom. The yeast does all the work while I sip coffee. No stand mixer, no fancy skills, just a bowl and patience (well, 20 minutes of it).
- Sweet & Chewy Perfection: That buttery richness with plump raisins? It’s like a hug in bread form. The sugar caramelizes just enough to make every slice taste like a bakery secret.
- Breakfast to Dessert: Honestly, I eat this for breakfast with jam, pack it for lunch, and sometimes—okay, often—serve it with ice cream. One loaf covers everything.
- Budget-Friendly Staple: Five ingredients, zero waste. The leftovers? Toast them, freeze them, or gift them. My wallet and my neighbors thank me for this recipe.
Step-by-step instructions for Amish raisin bread
Here's how to make this classic bread with perfect molasses swirls and a golden crust.
👨🍳 Step 1: Activate the Yeast and Mix the Dough
In a small bowl, combine the 1 cup warm water (about 110°F) with the 2.25 tsp active dry yeast and 0.25 cup granulated sugar. Let it sit for 5-10 minutes until frothy—this means your yeast is alive and ready to work. If it doesn't bubble, your yeast might be dead, and you'll need to start over.
In a large mixing bowl, whisk together the 5 cups all-purpose flour and 1 tsp salt. Cut in the 0.5 cup cold unsalted butter using a pastry cutter or your fingers until the mixture resembles coarse crumbs. Pour in the yeast mixture and mix until a shaggy dough forms. Here's the thing—this dough should be sticky, not dry. If it's too stiff, add 1-2 tablespoons of warm water. Cover the bowl with a damp towel and let it rest for 10 minutes while you prepare the filling.
👨🍳 Step 2: Prepare the Molasses Raisin Filling
In a small saucepan, gently heat the 0.5 cup molasses and 1.5 cups raisins over low heat for 3-4 minutes, stirring occasionally. You want the raisins to plump up and the mixture to thicken slightly—it should coat the back of a spoon but still be pourable. Let this cool completely before using, as warm filling can kill the yeast in your dough.
While the filling cools, combine the 1 whole large egg and 2 tbsp milk in a small bowl and beat lightly with a fork. This will be your egg wash for that beautiful golden crust. I like to use a fork instead of a whisk here—it keeps the egg from getting too frothy, which can make the bread dense.
🥘 Step 3: Knead and Shape the Dough with Filling
Turn the dough out onto a lightly floured surface and knead for 5-7 minutes until smooth and elastic. You'll know it's ready when it springs back when poked. Divide the dough into 4 equal pieces (about 12 ounces each) and roll each into a 12-inch log. Here's where it gets fun—take one of the logs and flatten it slightly, then spread about 2 tablespoons of the cooled molasses raisin mixture down the center.
Roll it up tightly, sealing the edges well. Repeat with the remaining dough and filling, creating 4 filled logs. Place them seam-side down in a 9x5-inch loaf pan that's been lightly greased. The logs should fit snugly side by side. Cover with a damp towel and let them rise in a warm place for 45-60 minutes, or until they've puffed up about 50% and look slightly domed.
🔥 Step 4: Bake to Golden Perfection
Preheat your oven to 375°F. While it's heating, dust the top of each loaf generously with cornmeal—this prevents sticking and gives that classic Amish bread texture. Brush the tops with the egg wash mixture, making sure to get into all the crevices. Bake for 35-40 minutes until the bread is deep golden brown and sounds hollow when tapped on the bottom.
I know it seems like too much time, but trust me—this slow bake ensures those molasses swirls stay gooey and the crust gets properly crisp. If the tops brown too quickly, tent the pan with foil. When done, remove from the oven and let cool in the pan for 10 minutes before transferring to a wire rack. The bread will be too tender to slice immediately, but it's worth the wait for that perfect texture.
⏰ Step 5: Rest and Serve
Let the bread cool completely on a wire rack for at least 1 hour before slicing. This resting period allows the internal structure to set, making each slice clean and easy to serve. The molasses swirls should be soft and gooey, with a beautiful caramelized sheen. If you cut into it too soon, the raisins will bleed out and the bread will be gummy.
Slice into ½-inch thick pieces and serve warm with butter or jam. Each bite should deliver that perfect balance of sweet molasses, chewy raisins, and a crispy crust that shatters just enough to give way to the soft interior. Store leftovers wrapped in plastic at room temperature for up to 3 days, or freeze for longer storage.
Pro Tips For Making Amish Raisin Bread
- Bloom Yeast Properly: Mix the yeast with warm water (110°F) and a teaspoon of sugar first, then let it sit for 5-7 minutes until frothy—this confirms it’s alive and ready. I learned this the hard way after baking a dense brick because my yeast was sluggish; now I never skip the test.
- Soften Butter First: Use cold butter straight from the fridge—it distributes better in the dough and prevents greasy hands. Cut it into small cubes and let it sit at room temp for 30 minutes before mixing, or pulse it in a food processor until pea-sized clumps form.
- Knead Until Smooth: The dough should pull away cleanly from the bowl and spring back when poked—about 8-10 minutes by hand or 5-6 minutes in a stand mixer. Over-kneading makes it tough, but under-kneading leaves it gummy; feel for that happy medium.
- Proof in a Warm Spot: Place the dough in a lightly oiled bowl, cover it, and let it rise in a warm oven (70°F) with the light on for 1-1.5 hours—this is faster than waiting by the stove. I used to rush it on the counter, and it always took twice as long.
Storing and reheating this amish raisin bread
Room Temperature Storage
This bread shines when made ahead—its flavors deepen over time. Wrap tightly in plastic wrap or beeswax food wrap and store at room temperature for up to 3 days.
The molasses swirls stay moist while the crust maintains its crispness. I like to keep it in a bread box or cotton towel-lined basket to prevent drying. 💛
Refrigerator Refresh
For longer storage, refrigerate in an airtight container for up to 5 days. To revive, wrap slices in a damp paper towel and warm in a 350°F oven for 5-7 minutes.
The raisins plump back up beautifully, and the crust crisps just enough to feel fresh again. Perfect for quick breakfasts when you're short on time.
Freezer Preservation
This bread freezes exceptionally well for up to 3 months. Wrap each loaf tightly in plastic wrap, then place in a freezer bag with all air squeezed out.
When ready to serve, thaw overnight at room temperature or warm directly from frozen in a 350°F oven for 20-25 minutes (covered with foil for the first 15 minutes). The texture remains tender, and the molasses stays gooey.
Reheating Secrets
For that freshly baked feel, reheat slices in a skillet over medium heat for 1-2 minutes per side with a pat of butter. Or, for a hands-off method, place slices on a baking sheet and warm in a 300°F oven for 5-7 minutes until golden.
Avoid microwaving—it turns the crust soggy and makes the raisins rubbery. 🔥
Slice Smart
Always slice thick pieces (about ½-inch) for the best texture. The crust should be crisp, the molasses swirls soft, and the raisins plump. For sandwiches, use the outer crust for structure while keeping the gooey center intact.
Leftovers? Toast them—the extra crispiness makes them taste like they're fresh from the oven.
Nutrition facts
Frequently asked questions
Can I substitute molasses with something else?
Yes! If you don't have molasses, try maple syrup or honey for a similar sweetness, though the flavor will differ slightly. Use the same amount (0.5 cup) and reduce other liquids by 2 tablespoons to maintain dough consistency. For a deeper caramel note, dark brown sugar mixed with a little water works too.
Why does my dough feel too sticky?
The dough should be sticky but manageable—this is normal! If it's impossible to handle, add 1-2 tablespoons of flour at a time until it's workable. Over-kneading can make it tough, so stop when it springs back when poked. For extra grip, wet your hands slightly while shaping to prevent sticking.
How do I fix if my bread turns out too dense?
Dense bread usually means over-kneading or under-proofing. Next time, knead just until smooth (5-7 minutes) and let the dough rise until it's 50% puffed. Also, ensure your yeast is active (test in warm water first) and your oven isn't too hot—375°F is ideal for even baking.
Can I make this bread without a loaf pan?
Shape the filled logs into free-form loaves or braids, then place them on a parchment-lined baking sheet. Brush with egg wash and bake at 375°F for 30-35 minutes, checking for golden color. For extra crustiness, sprinkle with cornmeal before baking. The texture will be slightly different but still delicious!
What’s the best way to reheat sliced bread?
For crispy crust and gooey centers, warm slices in a skillet over medium heat for 1-2 minutes per side with a pat of butter. Or, bake at 300°F for 5-7 minutes until golden. Avoid microwaving—it makes the raisins rubbery and the crust soggy. A quick toast in the toaster also works!