
Side Dishes
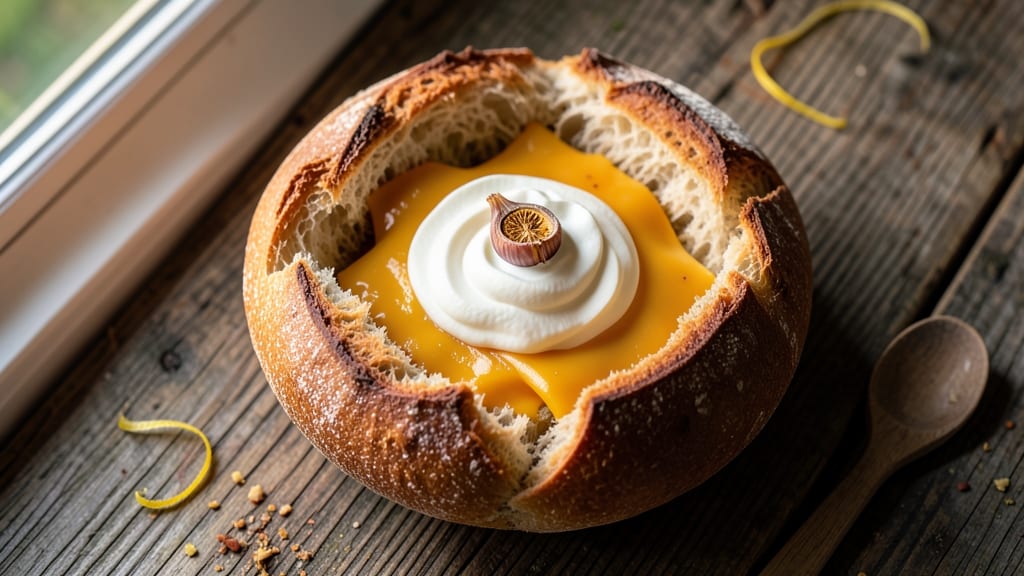
This artisan bread bowl recipe transforms humble loaves into edible vessels for creamy cheese and hearty fillings. The secret lies in hollowing out sturdy sourdough or ciabatta, then baking it to crisp perfection—creating a textural masterpiece that elevates any meal.
What starts as a simple bread becomes the star, holding rich fillings without losing its rustic charm.
The magic happens in two stages: carefully hollowing the bread to maintain structure while maximizing surface area for crisping, and pairing it with a filling that melts into the loaf's crevices.
Whether you choose a classic cheesy soup, spicy chili, or a decadent dip, the bread absorbs flavors while developing a golden, crunchy exterior that contrasts beautifully with the creamy center. This technique bridges tradition and innovation, turning a side dish into an interactive dining experience.
By the time you're done, you'll have a bread bowl that's both functional and impressive—crisp enough to hold its shape, tender enough to soak up every last drop of sauce. The contrast between the warm, toasted bread and the creamy filling creates a sensory experience that's impossible to resist.
It's the kind of dish that transforms ordinary meals into special occasions, all while keeping prep simple and satisfying.
Perfect for game day, holiday gatherings, or cozy weeknight dinners, this recipe proves that bread can be more than just a side—it can be the star of the show.
The best part? You can customize the filling to suit any craving, making it as versatile as it is delicious. Let's get started on creating your edible masterpiece.
Ingredients for artisan bread bowl
Sturdy loaves, creamy fillings, and crispy edges—this is your edible masterpiece starter kit.
| Ingredient | Amount | Notes |
|---|---|---|
| Sourdough Loaf 🍞 | 1 whole | Sturdy, day-old preferred |
| Ciabatta Loaf 🍞 | 1 whole | Alternative to sourdough |
| Sharp Cheddar Cheese 🧀 | 1 cup | Shredded, aged for flavor |
| Cream Cheese 🧀 | 8 oz | Full-fat for creaminess |
| Heavy Whipping Cream 🥛 | ½ cup | Cold for best texture |
| Garlic Cloves 🧄 | 3 cloves | Minced for aromatic depth |
| Chives 🌿 | 2 tbsp | Freshly chopped for garnish |
| Butter 🧈 | 2 tbsp | Melted for brushing |
| Olive Oil 🫒 | 2 tbsp | For crisping bread |
| Salt 🧂 | 1 tsp | Kosher or sea salt |
| Black Pepper 🌶️ | ½ tsp | Freshly ground preferred |
| Sour Cream 🥛 | ¼ cup | Optional for extra creaminess |
| Parmesan Cheese 🧀 | ¼ cup | Freshly grated for topping |
The bread is non-negotiable here. Sourdough or ciabatta from your local bakery—avoid the soft, squishy kind. Look for loaves with a dense crumb and thick crust. Whole Foods or Trader Joe's usually carry great options, but your neighborhood bakery might have even better. Day-old bread works best; it's sturdier and holds up to hollowing. If you're in a pinch, French bread can work too, but it won't have the same rustic charm.
No sharp cheddar? Gruyère or aged Gouda will add depth. Cream cheese is a must for creaminess, but mascarpone or ricotta can step in if you're feeling fancy. The heavy cream can be swapped for half-and-half if you're watching calories—just know the texture will be slightly lighter. Fresh chives are ideal, but dried chives at half the amount will do in a pinch. For the garlic, jarred minced garlic is fine if you're in a hurry, but fresh is always better.
This filling keeps beautifully—3-4 days in the fridge once assembled. The bread bowl itself reheats best in a 350°F oven for 5-10 minutes to restore crispiness. Portion the filling into containers first if you're prepping ahead; just warm it gently before stuffing. The bread bowl reheats best right before serving—trust me, the contrast of warm bread and creamy filling is magic. Freeze the filling separately for up to 3 months if you're planning ahead.
Why You'll Love This Recipe
- No-Bake Magic: I swear by this trick—just hollow out the loaves, mix the cheeses with a splash of cream, and slide it in. The bread soaks up that sharp cheddar creaminess like a sponge, but you’re not baking, not waiting, not stressing. Honestly, it’s the kind of recipe that makes me feel like a genius when my kids ask what’s for dinner.
- Cheese Lover’s Dream: That sharp cheddar mixed with cream cheese? It’s the kind of combo that makes you close your eyes. The crust stays sturdy enough to hold soup or chili, but the inside gets pillowy and rich—like a hug for your taste buds. And the whipping cream? Just enough to tie it all together without being heavy.
- Game for Any Meal: Need a last-minute appetizer? Hollow out a ciabatta, stuff it with the cheese mix, and serve it warm with a drizzle of honey. Hosting a crowd? Double the recipe and use both loaves—one for soup, one for dips. It’s my go-to for game day, book club nights, or when I’m too tired to plan.
- Zero-Waste Winner: Between us, I used to toss out stale bread or half-used cheddar. Not anymore. This recipe turns both into something spectacular, and the leftovers? Just reheat them in the oven for 5 minutes. Plus, the ciabatta’s airy pockets mean you’re not buying extra bowls—just repurposing what you’ve got. Budget-friendly? Absolutely. Smart? Even more so.
Step-by-step instructions for artisan bread bowl stuffing
Here's how to transform sturdy bread into the perfect vessel for creamy, cheesy goodness.
Prepare the Bread for Hollowing
Preheat your oven to 350°F and line a baking sheet with parchment paper. Choose either the sourdough loaf or ciabatta loaf—both work beautifully, but ciabatta's airy texture makes it especially sturdy. Place the loaf on the baking sheet and bake for 10 minutes to warm through and make it easier to slice.
While the bread warms, use a serrated knife to carefully slice off the top and bottom of the loaf, creating a flat surface. Then, make a vertical slice down the center, about ½ inch deep, stopping before you reach the bottom. This creates a hinge that will let you open the loaf like a book. Real talk: don't force it—if the bread resists, let it cool slightly and try again.
Create the Cheese Filling
In a medium bowl, combine the 8 oz cream cheese, 0.5 cup heavy whipping cream, 1 cup sharp cheddar cheese, 1 tsp salt, and 0.5 tsp black pepper. Use a hand mixer or whisk to blend until completely smooth and creamy—you want no lumps, as they'll make your filling grainy. I like to scrape down the sides occasionally to ensure everything incorporates evenly.
Next, fold in the 0.25 cup sour cream (if using) and the 3 cloves minced garlic cloves. Taste the mixture and adjust seasoning if needed—this is your flavor foundation, so don't be shy with the salt or pepper. The filling should be thick but still spoonable, almost like a rich, tangy dip. Cover and refrigerate while you prepare the bread bowl.
Hollow the Bread and Assemble
Once the bread has cooled slightly, carefully open it along your vertical slice, creating a book-like shape. Use a small spoon to scoop out the inner bread, leaving about ½ inch thick walls. Discard the scooped bread or save it for croutons. The hollowed loaf should now resemble a sturdy bowl with a lid—this is where the magic happens.
Spread about 1 tbsp melted butter evenly over the inner surfaces of the bread bowl. This step ensures your filling stays moist and adds a subtle richness. Then, spoon the cheese filling into the hollowed loaf, pressing down gently to fill it completely. The bread will absorb some of the filling, so don't worry if it doesn't look perfectly full at first.
Bake to Golden Perfection
Place the assembled bread bowl on the baking sheet and bake for 15-20 minutes until the edges are golden brown and the filling is bubbly. The bread should feel firm to the touch, and the cheese should be just starting to set but still creamy inside. Here's the thing—don't overbake, or the cheese will turn rubbery. If the top browns too quickly, tent it loosely with foil.
Once baked, let the bread bowl rest for 5 minutes before serving. This resting time allows the filling to set slightly, making it easier to scoop. Garnish with the 2 tbsp chopped chives and 0.25 cup freshly grated parmesan cheese right before serving. The contrast of the cool, creamy filling with the warm, crispy bread is what makes this dish truly special.
Serve and Enjoy
Carefully open the bread bowl and spoon out the creamy cheese mixture into individual bowls for serving. The bread itself can be served on the side as a delicious, crispy accompaniment. For an extra touch, drizzle a little olive oil over the bread and sprinkle with additional black pepper right before eating.
This bread bowl is perfect for serving with soups, salads, or even as a standalone appetizer. The combination of the sturdy bread and rich, cheesy filling creates a satisfying texture contrast—crispy outside, creamy inside. Plus, it's a fantastic way to use up day-old bread without wasting a single crumb!
Pro Tips For Making Artisan Bread Bowl
- USE TWO LOAVES: A sourdough loaf won’t hold enough filling—pair it with a ciabatta loaf for structural support. The ciabatta’s air pockets soak up excess cream while the sourdough provides the sturdy base you actually need (yes, even if it looks like overkill).
- BAKE THE BREADS FIRST: Cold bread won’t carve cleanly, and you’ll end up with a soggy mess. Toast both loaves at 350°F for 10 minutes before stuffing—this firms up the crumb and makes slicing a breeze. Trust me, you’ll regret skipping this if you’re serving a crowd.
- SALT THE CHEESE MIX: Sharp cheddar and cream cheese alone won’t bind well—mix in ½ teaspoon of salt per cup of filling. It sounds odd, but the salt helps the cheeses melt into a cohesive, spreadable texture instead of clumping like a sad, grainy paste.
- COOL THE FILLING SLIGHTLY: Stuffing warm cheese into the bread bowl? Disaster. Let the cheese mixture sit at room temp for 10 minutes after mixing—it’ll hold its shape better and won’t ooze out when you slice. (I learned this after a very messy Thanksgiving attempt.)
Storing and reheating this recipe
Refrigerator Storage
Store your filled bread bowl in an airtight container for up to 3 days—the filling stays creamy while the bread maintains its crisp texture. I like using glass Pyrex containers because they keep the bread from drying out.
Place parchment paper between layers if stacking multiple bowls to prevent sticking. The cheese filling will firm up slightly in the fridge, making it easier to scoop later. 🧊
Freezer Storage
For longer storage, freeze the unbaked bread bowl (with filling) for up to 1 month. Wrap it tightly in plastic wrap first, then place in a freezer-safe bag with all air removed. Thaw overnight in the fridge before baking—this prevents condensation from making the bread soggy.
I recommend freezing the bread and filling separately if you plan to reheat the filling alone for soups or dips.
Reheating Methods
For the best texture, reheat the bread bowl in a 350°F oven for 5-10 minutes until golden and crisp. If using the microwave, cover with a damp paper towel and heat in 30-second bursts until warm—this prevents rubbery cheese.
The bread's crispiness is key, so always reheat it separately if you're just warming the filling for soups or dips.
Filling Prep Ahead
Make the cheese filling 2 days ahead and store it in an airtight container in the fridge. It keeps beautifully and tastes even richer after flavors meld. When ready to assemble, simply spoon the chilled filling into the hollowed bread and bake fresh.
This is my go-to strategy for game day prep—less stress on the big day! 🏈
Reviving Crispiness
If your bread bowl loses its crunch overnight, pop it in the oven for 3-5 minutes at 375°F to restore crispiness. Brush with melted butter before reheating for extra golden browning.
The secret to maintaining texture is never microwaving the bread alone—always reheat it with the filling or separately in the oven.
Serving Suggestions
Serve the bread bowl as a dip for veggies, a soup accompaniment, or a standalone appetizer. Garnish with fresh chives and Parmesan just before serving to keep it looking fresh.
For extra flair, drizzle with truffle oil or sprinkle with smoked paprika—the contrast of warm bread and creamy filling is always a crowd-pleaser! 🌟
Nutrition facts
Frequently asked questions
What's the best bread for a bread bowl?
Sourdough or ciabatta are ideal—their sturdy structure holds up to hollowing and baking. Avoid soft breads like brioche, which will fall apart. Look for loaves with thick crusts and dense crumb for maximum crispiness. A day-old loaf works best as it's firmer and less prone to tearing.
Can I make this bread bowl ahead of time?
Yes! Assemble the bread bowl 2 days ahead and refrigerate it unbaked. When ready to serve, bake it fresh for 15-20 minutes at 350°F to restore crispiness. The filling can also be made separately and stored for 3 days—just warm it gently before serving. This is perfect for game day prep!
Why did my bread bowl turn soggy?
Sogginess usually happens from moisture buildup. Always bake the bread bowl fresh or reheat it in the oven (never microwave the bread alone). If storing, keep it in an airtight container and brush the inside with melted butter before baking to create a moisture barrier. For extra crispiness, bake at 375°F for 3-5 minutes before serving.
What if I don't have cream cheese?
No problem! Swap it for mascarpone or ricotta for a lighter texture, or use full-fat cottage cheese blended smooth for a tangier flavor. For extra richness, add 2 tbsp sour cream to the filling. The key is maintaining creaminess—avoid low-fat options as they won't melt as smoothly.
How do I make this gluten-free?
Use a gluten-free bread loaf with a sturdy structure (like a GF sourdough or baguette). For the filling, ensure your cream cheese and cheddar are certified gluten-free. Substitute regular flour in any toppings (like breadcrumbs) with GF alternatives. Test the bread's durability first—some GF loaves may need extra support when hollowing.