
Side Dishes
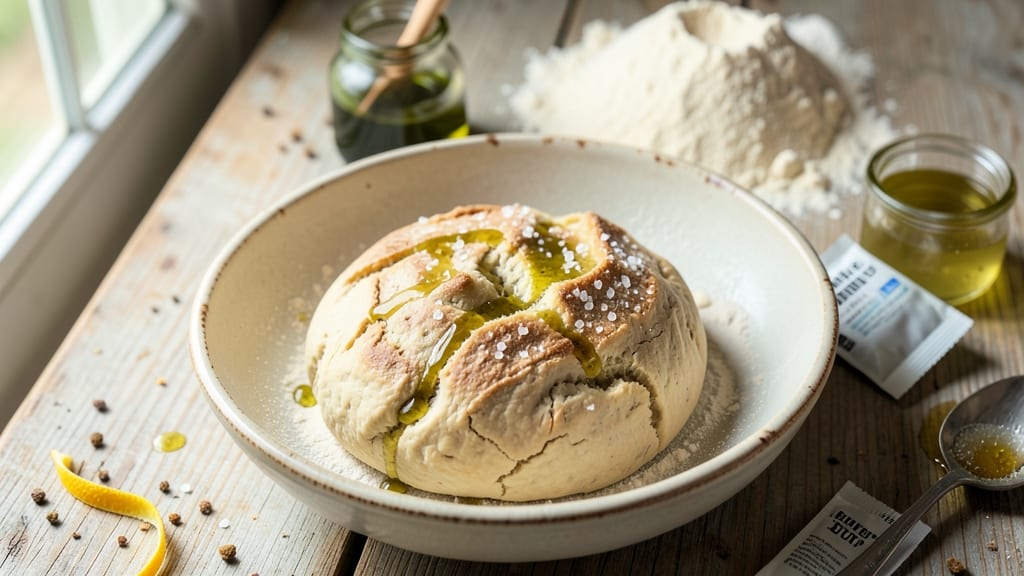
This artisan olive oil bread recipe transforms simple ingredients into a rustic masterpiece with a crusty exterior and tender interior. The secret lies in high-quality extra virgin olive oil, which infuses every bite with Mediterranean richness while creating that signature golden crust.
I developed this recipe after years of perfecting the balance between texture and flavor—no more dry, dense loaves or soggy centers.
The process begins with a foolproof dough that combines flour, olive oil, and herbs for an aromatic depth you won't find in store-bought bread.
Unlike commercial loaves, this version relies on proper kneading, slow proofing, and high-heat baking to achieve that coveted crispy crust while keeping the interior soft and airy. The olive oil doesn't just flavor the bread—it creates a tender crumb that holds up beautifully for days.
By the time your bread emerges from the oven, you'll have a loaf with a glossy golden crust that shatters satisfyingly and a fragrant interior perfumed with herbs. The olive oil adds a subtle fruity note that pairs perfectly with charcuterie, soups, or simply dipped in more olive oil.
This is the kind of bread that elevates any meal from ordinary to extraordinary.
Perfect for serving alongside antipasto platters, fresh salads, or as a centerpiece for your dinner table. The recipe scales easily, so you can bake one loaf for a cozy night in or two for entertaining. Let's get started on creating your perfect artisan loaf.
Ingredients for artisan olive oil bread
High-quality flour and olive oil create the perfect balance for this rustic artisan loaf.
| Ingredient | Amount | Notes |
|---|---|---|
| All-Purpose Flour 🌾 | 4 cups | High-protein for better structure |
| Extra-Virgin Olive Oil 🫒 | ¾ cup | Fruity, peppery variety preferred |
| Active Dry Yeast 🍞 | 2 ¼ tsp | Fresh yeast at half amount |
| Granulated Sugar 🍚 | 1 tbsp | For yeast activation |
| Warm Water 💧 | 1 ¼ cups | Not boiling, lukewarm |
| Fine Sea Salt 🧂 | 1 ½ tsp | Diamond Crystal preferred |
| Dried Rosemary 🌿 | 1 tsp | Finely chopped, not powdered |
| Dried Thyme 🌿 | 1 tsp | Fresh works at double amount |
| Cornmeal 🌽 | ¼ cup | For dusting baking sheet |
| Coarse Kosher Salt 🧂 | 2 tbsp | For sprinkling crust |
| Ice Water ❄️ | ½ cup | For final shaping |
The olive oil is non-negotiable here—look for extra-virgin with fruity, peppery notes. Ottolenghi or California Olive Ranch are my go-tos, but any reputable brand works. For the flour, King Arthur or Caputo Tipo 00 (if you can find it) give the best texture, but all-purpose in a pinch. The yeast needs to be fresh—if your packet's past its expiration, test it in warm water first. Rosemary and thyme should be finely chopped for even distribution, not left as whole sprigs. Store your herbs in a dark, airtight container to preserve their aroma.
No extra-virgin olive oil? Light olive oil works, but the flavor won't be as rich. Swap the dried herbs for fresh at double the amount—just finely chop them to mimic the texture. Running short on cornmeal? Semolina or all-purpose flour will work for dusting. The coarse kosher salt is crucial for that signature crust—Morton's is reliable, but any coarse salt will do. If your yeast isn't active, warm the water slightly longer (up to 115°F) to encourage bubbles. For a quicker rise, use instant yeast at half the amount—no kneading required.
This dough keeps beautifully—cover and refrigerate for up to 24 hours if you need to slow-proof. For best results, bake within 8 hours of mixing. The finished loaf stays fresh 3 days at room temperature, wrapped tightly. To revive stale bread, warm in a 300°F oven for 10 minutes. Freeze slices for up to 3 months—toast directly from frozen. Store the olive oil in a cool, dark place away from heat sources to prevent rancidity.
Why You'll Love This Recipe
- No-Knead Magic: I swear by this—just mix the dough, let it rise overnight, and bake. That’s it. The yeast does all the work while I sleep, and by morning, I’ve got golden crust without a single punch of energy.
- Rich, Buttery Crust: That first bite? Pure olive oil luxury. The crust crackles like a fresh baguette, but the inside stays soft and tender—no dry, sad loaf here. Honestly, I’d eat this plain if I had to.
- Weeknight Workhorse: Toss it with tomatoes and basil for a quick lunch, tear it into croutons for salads, or freeze slices for toast later. Between us, I’ve used this bread for everything from sandwiches to dipping in soup, and it never lets me down.
- Budget-Friendly Staple: Five ingredients, zero specialty items. I’ve made this for years, and the cost per loaf is criminally low. Plus, one batch stretches into leftovers for days—my wallet and my lunchbox thank me every time.
Step-by-step instructions for artisan olive oil bread
Here's how to craft a rustic loaf with a crisp exterior and fragrant herb-infused crumb—every bite delivers that perfect balance of olive oil richness and herbal complexity.
Activate the Yeast with Warm Water and Sugar
In a small bowl, combine the 1.25 cups warm water (around 110°F—test by dipping your finger in; it should feel warm but not hot) with the 1 tbsp granulated sugar. Stir until the sugar dissolves completely. This sweet solution creates an ideal environment for yeast activation.
Sprinkle the 2.25 tsp active dry yeast over the water and let it sit for 5-10 minutes until it becomes frothy and bubbly. You'll see tiny bubbles forming on the surface—this confirms the yeast is alive and ready to work. If it doesn't bubble after 10 minutes, your yeast may be inactive, and you'll need to start over with fresh yeast.
Mix the Dough with Olive Oil and Herbs
In a large mixing bowl, whisk together the 4 cups all-purpose flour, 1.5 tsp fine sea salt, 1 tsp dried rosemary, and 1 tsp dried thyme. Create a well in the center and pour in the yeast mixture along with the 0.75 cup extra-virgin olive oil. The olive oil will add richness and help create that signature tender crumb.
Using a wooden spoon or your hands, mix the ingredients until a shaggy dough forms. The olive oil will make the dough slightly sticky—this is normal. Once combined, turn the dough out onto a lightly floured surface and knead for 8-10 minutes until smooth and elastic. You're looking for a dough that springs back slowly when poked, indicating proper gluten development.
Bulk Ferment for Maximum Flavor Development
Shape the dough into a ball and place it back in the bowl, seam-side up. Cover the bowl loosely with plastic wrap or a damp towel and let it rise in a warm place for 1-2 hours, or until it has nearly doubled in size. This bulk fermentation allows the yeast to work its magic, developing flavor and creating that airy texture.
I like to give the dough a gentle fold every 30 minutes during this time—simply press down on one side of the dough, stretch it upward, and fold it over itself. This helps strengthen the gluten structure and ensures even fermentation. When the dough has puffed up significantly and feels light to the touch, it's ready for shaping.
Shape and Final Proof Before Baking
Turn the dough onto a lightly floured surface and gently deflate it by pressing down with your fists. Shape it into a 12-inch long oval loaf by rolling it from one end to the other. The tension on the surface will help create that beautiful crust later. Place the shaped dough on a baking sheet dusted with 0.25 cup cornmeal to prevent sticking.
Cover the dough again and let it proof for another 30-45 minutes until it has risen about 50% and looks slightly domed. The surface should feel firm but still yield slightly when pressed. Just before baking, sprinkle the dough generously with 2 tbsp coarse kosher salt—this will create that coveted crispy crust.
Bake for a Crisp Crust and Fragrant Crumb
Preheat your oven to 425°F with a baking stone or inverted baking sheet on the middle rack. This creates steam that helps develop that perfect crust. Once preheated, place the baking sheet with the dough on it in the oven and bake for 25-30 minutes, until the bread is deep golden brown and sounds hollow when tapped on the bottom.
For the final touch, I like to spray the oven walls with water just before baking—this creates extra steam during the first 10 minutes, which helps develop that beautiful oven spring. Let the bread cool on a wire rack for at least 30 minutes before slicing. This resting period allows the crumb to set and the flavors to meld completely.
Pro Tips For Making Artisan Olive Oil Bread
- MEASURE FLOUR BY WEIGHING: I learned this the hard way—scooping flour from the bag packs in too much air, and your dough ends up dry or gummy. Use a kitchen scale for the flour (about 350g for a standard recipe) and spoon it in gently. The difference in texture is night and day.
- USE ROOM-TEMPERATURE OLIVE OIL: Cold olive oil from the fridge won’t emulsify properly, and your dough will feel greasy instead of smooth. Let that bottle sit out for 30 minutes before measuring—just enough to coat your fingers when you handle the dough. Trust me, your bread’s crumb will thank you.
- SKIP THE KNEADING SHORTCUT: I was skeptical until I tried it: let the dough rest for 10 minutes after mixing before the first fold. This relaxes the gluten so you get a tender crumb without overworking it. No food processor? Do three sets of stretch-and-folds instead of punching it down.
- BAKE WITH STEAM FIRST: Preheat your oven with a cast-iron skillet or baking stone inside—then add a splash of water to the pan when loading the dough. The steam mimics a professional oven and gives you that golden, crackly crust. I know, I know, but trust the process—your bread’s rise will be worth it.
Regional styles of this dish
Mediterranean Rustic Style
The original inspiration for this olive oil bread comes from traditional Italian pane al olio, where olive oil replaces butter entirely. In regions like Tuscany, cooks use fresh rosemary and thyme from their gardens, and the bread is often baked in a wood-fired oven for that authentic smoky aroma.
I've adapted this by using dried herbs for convenience, but if you have fresh, double the amount and finely chop them for the same aromatic punch. 🌿
For an authentic touch, brush the baked loaf with an extra 1 tablespoon of high-quality extra-virgin olive oil while it's still warm. This creates a glossy finish that mimics the look of freshly baked Italian focaccia.
Serve it with a side of aged balsamic vinegar for dipping—this is a classic pairing in Italian homes. The key difference from commercial bread is the olive oil content, which should be at least 15% of your flour weight for that signature tender crumb.
Provençal Herb Variation
In Provence, France, bread often features a mix of herbes de Provence, which includes lavender, tarragon, and savory. Swap the rosemary and thyme for 1 tablespoon of herbes de Provence to capture this regional flavor.
The lavender adds a subtle floral note that pairs beautifully with the olive oil's peppery finish. For extra authenticity, sprinkle edible lavender buds on top before baking—just ½ teaspoon is enough to add color and aroma without overpowering.
Provençal bakers also use a technique called pétrissage where the dough is kneaded longer (up to 15 minutes) to develop more gluten, creating a chewier texture.
If you want to try this, increase your kneading time and add 1 extra tablespoon of olive oil to compensate for the extra handling. The result is a bread with a slightly denser crumb but more complex flavor.
Greek Olive Oil Loaf
In Greece, olive oil bread often includes orange zest for brightness and sometimes a touch of fennel seeds for warmth. Add 1 teaspoon of finely grated orange zest to the dough along with the herbs, and sprinkle ½ teaspoon of fennel seeds on top before baking.
The citrus notes cut through the richness of the olive oil, making each bite refreshing. Greek bakers also use sesame seeds for topping—sprinkle 1 tablespoon on the dough before the final proof for a nutty crunch. 🍊
For a true Greek touch, serve the bread with olive tapenade or a simple tomato and cucumber salad. The olive oil in the bread complements the Mediterranean flavors perfectly.
Greek versions often use less yeast (reduce to 2 teaspoons) for a slower fermentation, which enhances the bread's depth of flavor. Let the dough ferment overnight in the refrigerator for even more complexity.
Spanish-Style Pan de Aceite
Spain's pan de aceite is another olive oil-rich bread, often baked in a round shape and topped with coarse salt. Shape your dough into a round boule instead of an oval, and use 3 tablespoons of coarse kosher salt for the topping.
Spanish bakers also add smoked paprika for depth—include ½ teaspoon in the dough for a subtle smoky note. The high olive oil content (up to 20% of flour weight) gives this bread a luxurious mouthfeel. 🌶️
For an authentic Spanish experience, bake the bread in a cast iron skillet preheated in the oven. This creates a crispier crust and a slightly charred bottom, similar to pan con tomate.
Serve with manchego cheese and serrano ham**>—the salty, fatty flavors balance the bread's richness beautifully. Spanish versions often include garlic powder (add ½ teaspoon) for extra savory depth.
Nutrition facts
Frequently asked questions
Why does olive oil make this bread different from regular bread?
The olive oil creates a tender crumb and rich flavor that butter or vegetable oil can't match. It's 15% of the flour weight in this recipe, which keeps the bread moist for days while adding fruity, peppery notes. The high smoke point also helps develop that signature golden crust.
Can I make this bread without a stand mixer?
This dough is designed for hand-kneading. Work it on a lightly floured surface for 8-10 minutes until smooth and elastic. The olive oil makes it slightly sticky, so wet your hands occasionally to prevent sticking. For extra strength, do 30-second stretches every 2 minutes instead of continuous kneading.
What if my dough doesn't rise properly?
Check your yeast first—it should bubble within 5-10 minutes in warm water. If not, use fresh yeast. Keep the dough in a warm place (75-80°F)—try placing it near your oven with the light on. For slow rises, refrigerate the dough overnight and let it come to room temp before shaping. Never exceed 2 hours of bulk fermentation at room temperature.
How do I store leftover olive oil bread?
Wrap cooled bread tightly in plastic wrap or place in an airtight container. It stays fresh 3-4 days at room temperature. For longer storage, freeze slices wrapped individually—they'll toast perfectly from frozen. To revive stale bread, warm at 300°F for 10 minutes or brush with olive oil and reheat briefly.
Can I add other herbs or flavors?
Yes! Try 1 tbsp herbes de Provence for Provençal flair or 1 tsp garlic powder for Spanish-inspired bread. For a citrus twist, add 1 tsp orange zest. Keep total additions to 1 tbsp or less to maintain the bread's structure. Always measure carefully—too much can make the dough sticky or affect rise.